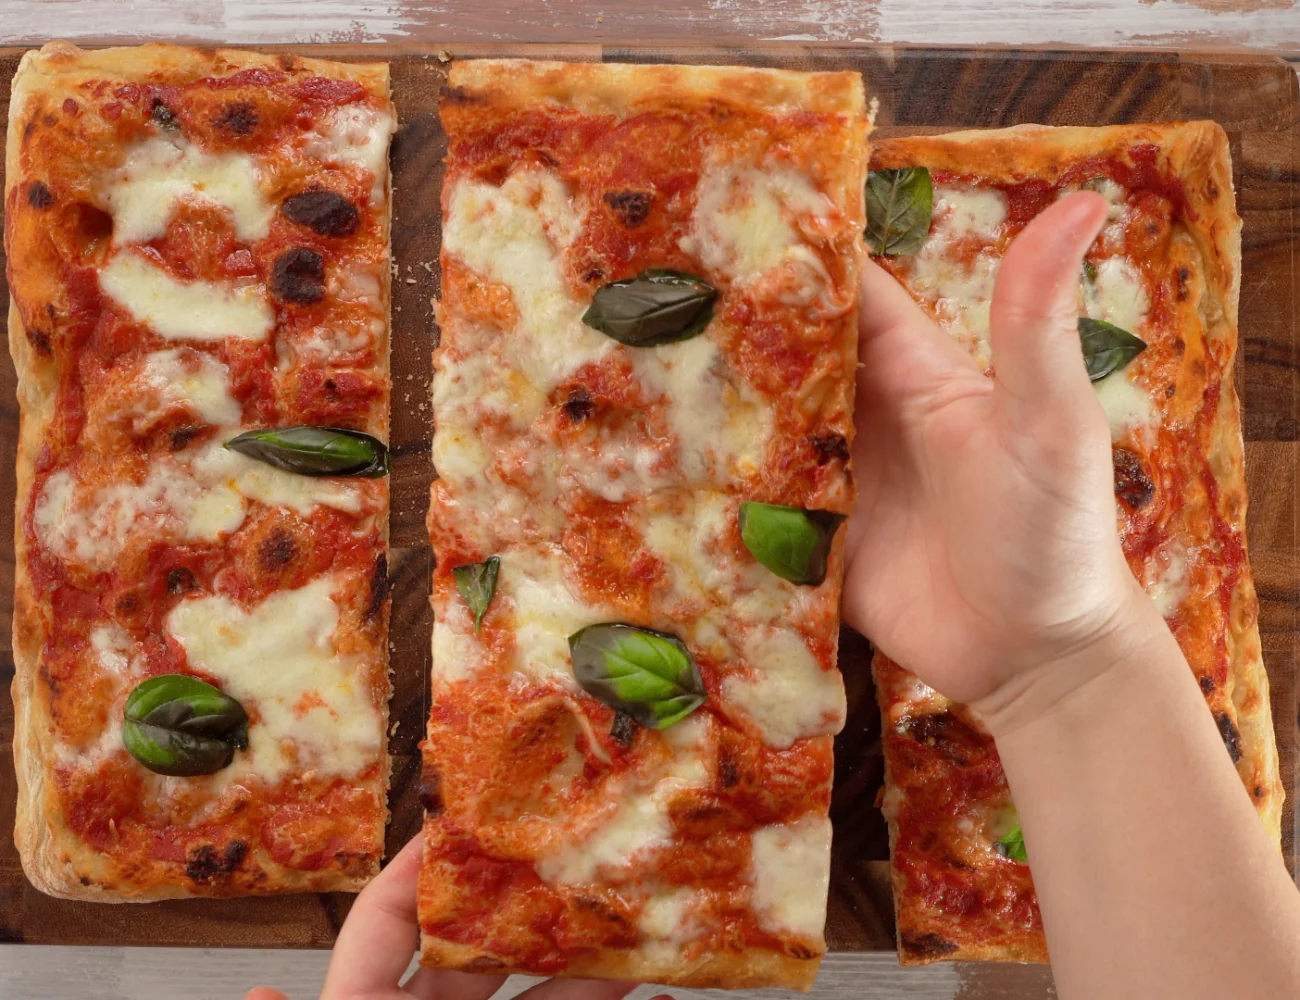
An EASY and FAST homemade pan pizza just as many families make it in Italy! This homemade pizza dough is digestible, delicious and ready in about 4 hours. Sometimes called ‘sheet pan pizza’ (in italian “pizza alla teglia”), this pan pizza is the most popular in homes throughout Italy. Got a KitchenAid stand mixer? This is an ideal stand mixer pizza dough recipe! In this guide, you’ll learn how to…
- make homemade pizza dough that is highly digestible in just 3-4 hours
- make pizza dough with a stand mixer (here, a KitchenAid stand mixer)
- stretch pizza dough for a sheet pan pizza
- bake a delicious pan pizza in a conventional home oven
Watch the Video Recipe!
Learn how to make a homemade pan pizza to DIE FOR! This homemade pizza dough can be ready for baking in about 3 hours. We’ll show you how to bake it as a classic ‘Pizza Margherita’ and as a ‘boscaiola’ (woods) pizza with sausage and mushrooms in this video:
Watch more PIATTO Pizza Making Videos!
Subscribe to our YouTube Channel
More video recipes? Subscribe to our YouTube Channel (it’s FREE) and click the bell to get notifications when we release a new video recipe!
What Flour to Use
Choose a ‘strong’ flour to make this pizza dough. The flour package should say that the ‘W’ is 260-280. You can also just select a flour that says it is made for pizzas, however sometimes these so-called pizza flours can be hard to digest.
To learn more about what the ‘W’ means on the flour package, keep reading till the end of this article!
We use ‘Caputo Nuvola’!
We Caputo Nuvola for this pizza dough recipe! It is a…
- Flour ‘0 ‘
- with a W 260-280
Used in pizzerias throughout Italy, this flour is thankfully available on Amazon! It’s perfect for soft digestible pizza, and it is the product shown in our video recipe!
You can find Caputo Nuvola on Amazon (affiliate link): https://amzn.to/3KtEcYV
Perfect Stand Mixer Pizza Dough Recipe!
Ultimately, any pizza dough recipe can be made (mixed and kneaded) with a reasonably powerful stand mixer. You can even use a stand mixer to mix and knead high-hydration pizza dough recipes.
However, we almost always use our KitchenAid Stand Mixer for mixing and kneading this pizza dough. And, we’ve shown that process in the video and recipe photos to help those of you who want to follow along with your stand mixer!
How to Choose Flour for Pizza Dough
Gluten Matters
Gluten is a hydrophobic protein (it does not dissolve in water) which derives from the union of the two most abundant proteins in flour: glutenin and gliadin.
Flour Strength – ‘W’
Flour ‘strength’ is expressed with the letter “W” on the flour package.
This gives us a clear idea of how our dough will behave during and after rising. The strength is measured by the manufacturers through a laboratory device called Chopin’s alveograph and is directly proportional to the amount of gluten in the dough.
By definition, flours with…
- W between 180-260 are medium strength flours
- W below 180? The flour is weak.
- Above 260? The flour is strong.
Choosing Flour for Pizza Dough
In general, you want to choose your flour based on the amount of hydration of the dough and the rising time. The higher the water content and / or the time you will let the dough rise, the higher the W of the flour must be.
However, with this pizza dough recipe, you don’t need to work out these details 🙂
Active Yeast, Instant Yeast, Fast Rise Yeast: What’s the Difference?
- Dry Active Yeast: You must first dissolve dry active yeast in warm water (around 110-115°F/43-46°C) before adding it to a recipe, a process we call proofing or blooming. It contains larger, dehydrated yeast cells and takes longer to ferment than other types of yeast. This longer fermentation period gives breads a distinctive flavor and texture.
- Instant (or Rapid-Rise) Yeast: Instant yeast, also known as rapid-rise or quick-rise yeast, comes in smaller, more finely granulated form that you can add directly into your dry ingredients without dissolving it in water first. It starts working faster than active dry yeast and is a popular choice for recipes that require a fast rise, such as cinnamon rolls or pizza dough. However, because of the shorter fermentation period, breads made with this yeast usually have a less yeasty flavor.
- Fast-Rise Yeast: Fast-rise yeast, essentially another name for instant yeast, is designed to make bread dough rise faster and higher. You can mix it directly with the dry ingredients without needing to dissolve it first. This yeast is excellent for bread machines due to its rapid rising properties.
When substituting one type of yeast for another in a recipe, remember to adjust the quantity to account for their different rising properties. As a general rule of thumb, if you’re substituting active dry yeast with instant yeast, use about 25% less instant yeast than the recipe’s specified amount of active dry yeast.
This recipe recommends using instant yeast.
Tips for Baking Pizza
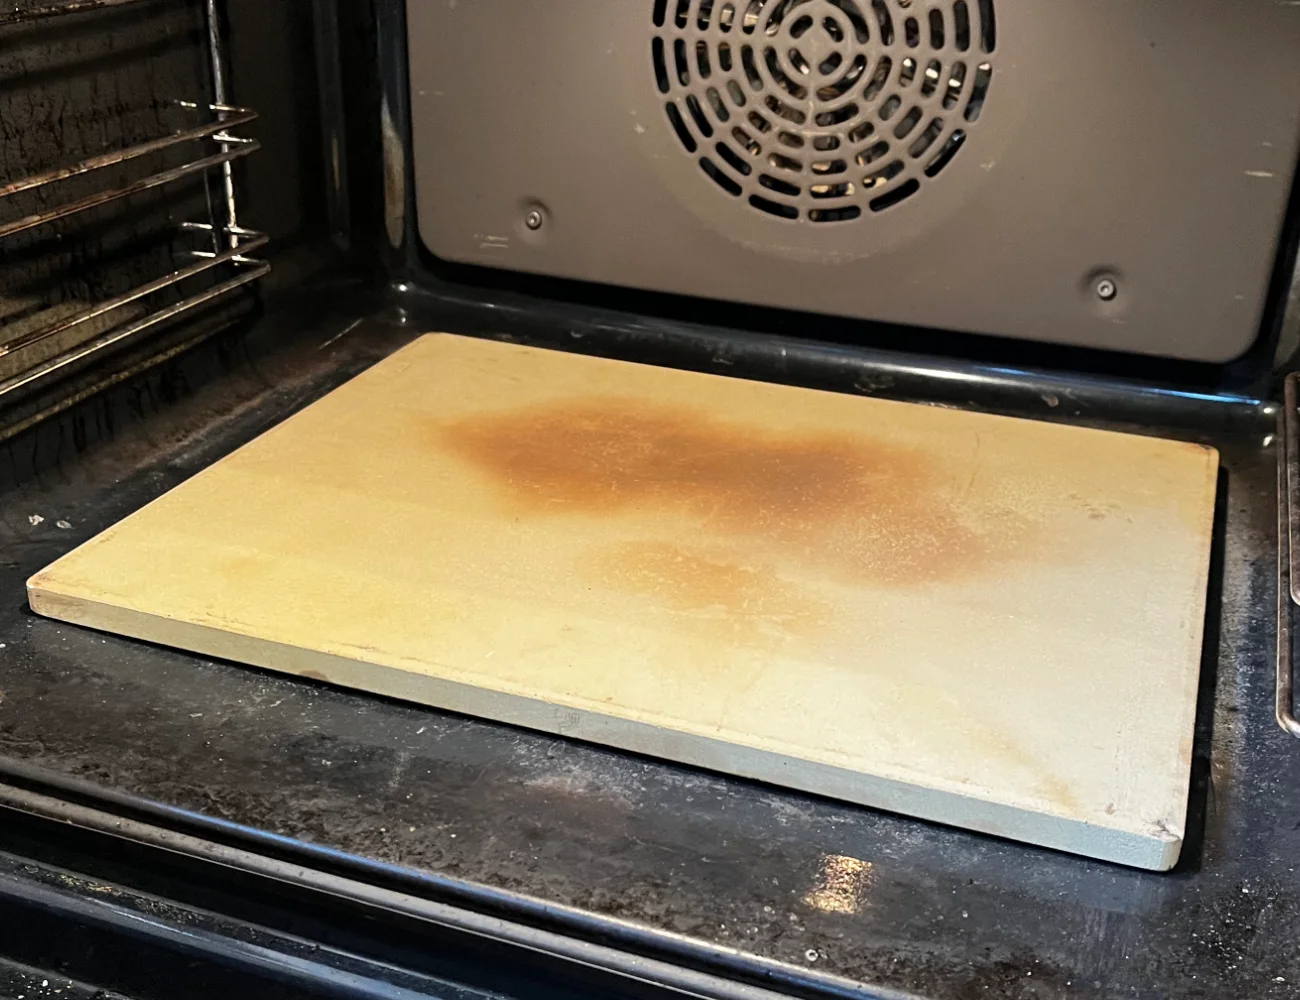
We always use a baking stone (affiliate link) for baking our high hydration pizzas—for baking all pizzas in fact! We also bake our breads—such as this high hydration focaccia recipe—on a baking stone. Pizzas in Italy are typically baked in wood fired ovens that can reach much higher temperatures than a conventional oven.
To bake at the highest temperature in a conventional oven, we place our baking stone directly on the floor of our oven. We then place our high hydration pizza (or whatever pizza we are baking) in the pan directly on the pizza stone (see below). This enables us to create a fast and even bake.
Won’t this warp the baking tray? Only if you are using a cheap baking tray 🙂 Unfortunately, there are no products on Amazon that we found suitable for the job. Our baking trays are ‘blue iron’ (ferro blu). We purchased our trays from this Italian company. The company is not sponsoring us in any way. We are just sharing this information to assist you.
Why do we like these trays? These blue iron trays provide an incredibly even bake, are solid at high temperatures and have straight edges with cross in the center to prevent warping.
As an Amazon Associate, we earn from qualifying purchases. This means at no extra cost to you, PIATTO may earn a small commission if you click the links and make a qualifying purchase.
How to Make Quick Pan Pizza in 3 Hours | Stand Mixer Pizza Dough Recipe
Equipment
- 1 baking stone optional
- 2 baking trays Here? Rectangular 16 x 12 in or 40 x 30 cm trays
- 1 stand mixer optional (for mixing and kneading the dough)
Ingredients
- 9 cups bread or pizza flour 9 cups = 2.2 lbs; Choose a flour with a 'W' of 280-320
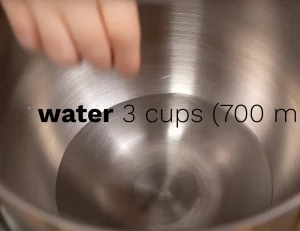
- 3 cups water
- 1 tsp dry instant or 'fast rise' yeast 1 tsp dry yeast = 6 grams of fresh yeast
- 4 tsp fine salt
Instructions
Make the Pizza Dough
- Combine the yeast with the water. You can use fresh yeast or dry instant yeast.3 cups water, 1 tsp dry instant or 'fast rise' yeast

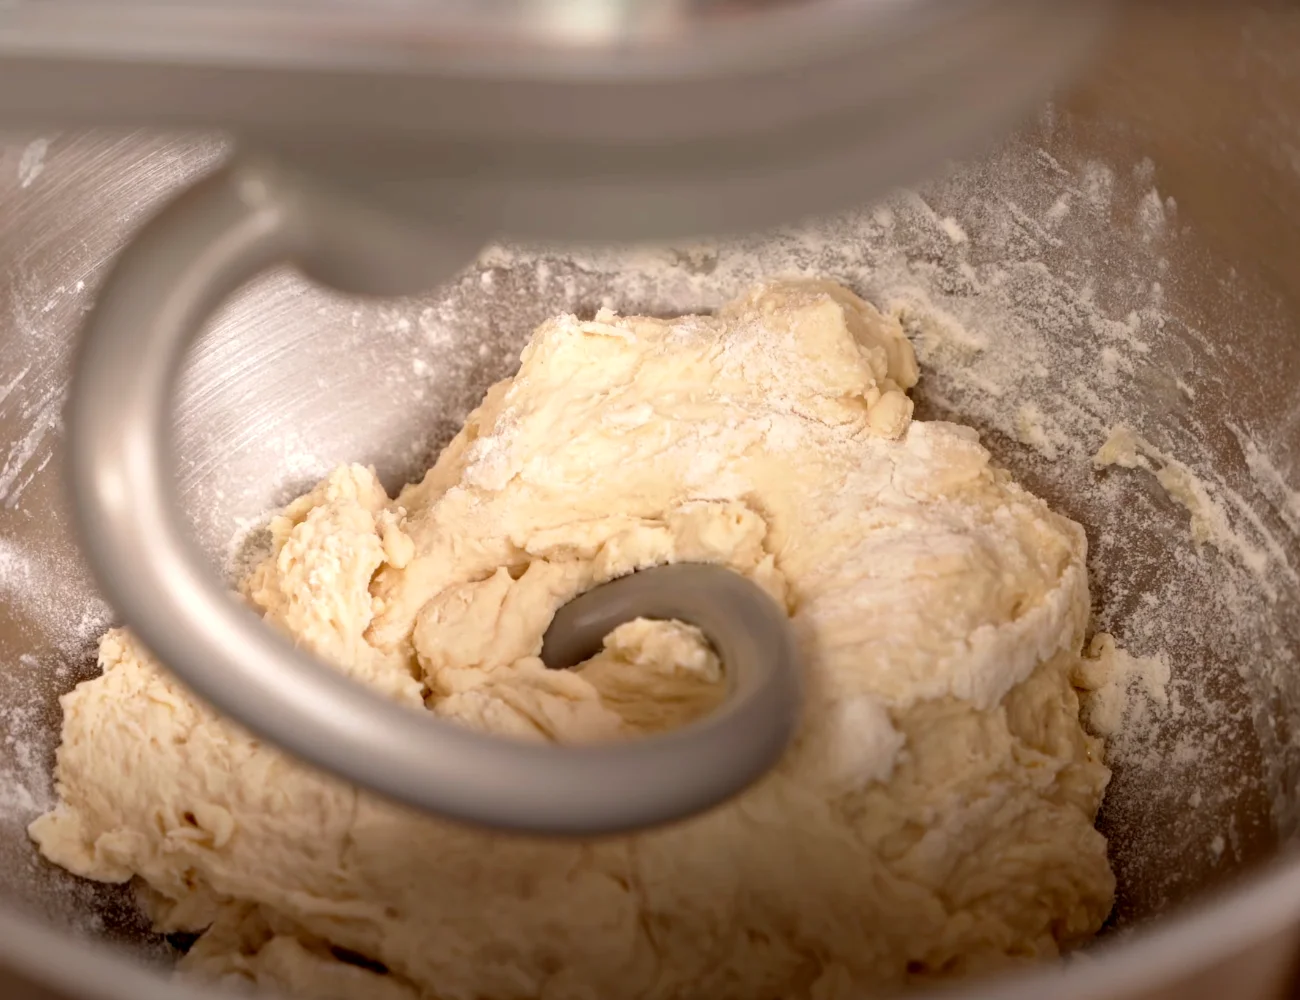
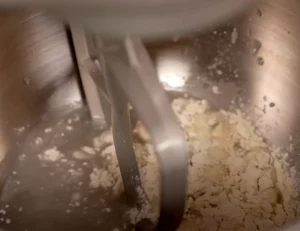
- Add these ingredients to the stand mixer bowl if using a stand mixer to prepare this dough. Fit the stand mixer with the paddle attachment.Add the flour and salt to the water and yeast.
- Mix the dough with the paddle attachment until the dough forms a ball.
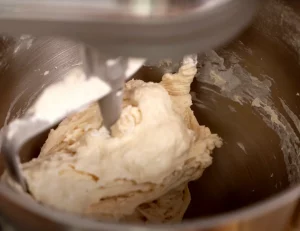
- Time to knead the dough! If using a stand mixer, replace the paddle attachment with the dough hook. Knead the dough on low speed for about 10 minutes.

Easy Folds and 1st Dough Proof
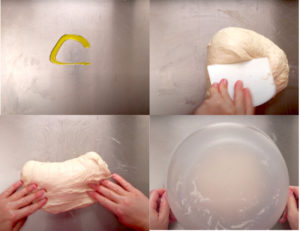
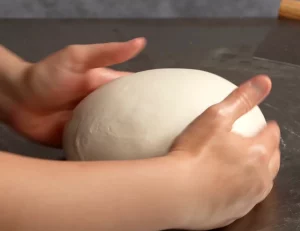
- Transfer to the dough to a lightly oiled work surface. Give the dough a series of book folds until the dough can no longer be folded. Let the dough rest (covered) for 10 minutes.
- Give the dough another series of book folds until the dough can no longer be folded. Let the dough rest (covered) for another 10 minutes.
- Give the dough a final series of book folds until the dough can no longer be folded. Let the dough rest (covered) for another 10 minutes.
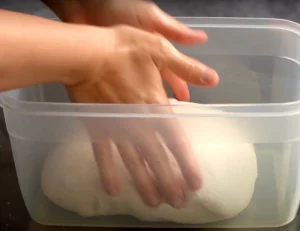
- Transfer the dough ball to a large container the same shape as the tray in which you plan to bake the pizza. So, choose a rectangular container if you plan to bake a rectangular pan pizza. The dough will be much easier to stretch to the shape of the tray if you have proofed it in more or less the same shape as your tray.
- Let the dough proof (covered) in the container for about an hour—or until it has doubled in size. The ideal proofing temperature is 82°F (28°C). To turn your oven into a proofing box, set a hot bowl of water next to your covered dough in an oven that is turned off. This will provide the dough with the ideal temperature and humidity for proofing!
2nd Dough Proof
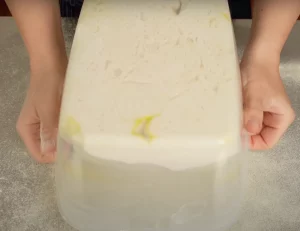
- After the first proof, transfer the dough to a lightly floured work surface. Turn the container over and let the dough gently fall out, retaining its shape.
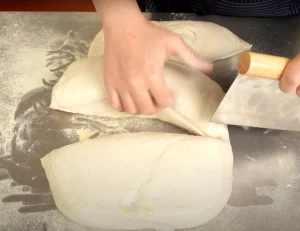
- Sprinkle the top of the dough with flour (preferably semolina flour). Divide the dough into 3 equal pieces.
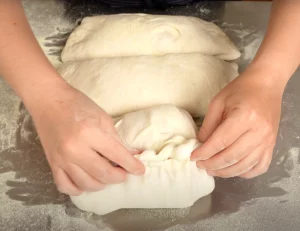
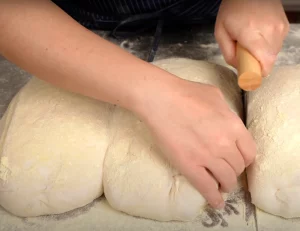
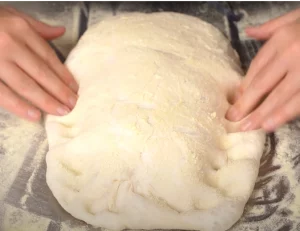
- Give each piece of dough another round of folds to trap air into the dough. Try to again give them the same basic shape as your baking tray (so, rectangular dough balls for a rectangle baking tray).
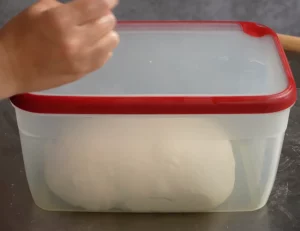
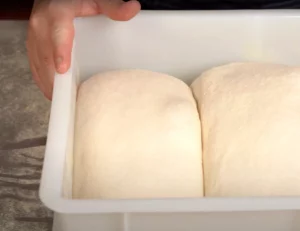
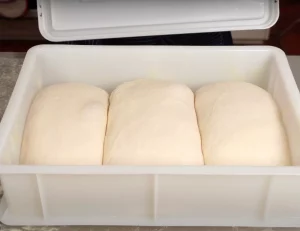
- Proof the pieces of dough (covered) for 2 more hours.
- You can transfer the dough balls to another, larger container for proofing them. Or, cover them with a damp tea towel. The container is better because it helps the dough maintain the shape you've given them as they rise.
Stretch the Pizza Dough
- Generously sprinkle your work surface with flour (preferably semolina). If needed, gently separate the dough pieces from one another.
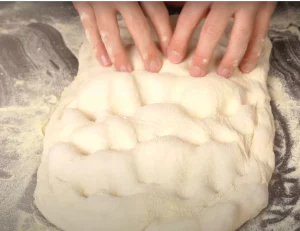
- Stretch each pizza dough to the size of the baking tray. First, press down the borders with your fingertips.
- Then use your fingertips to press down and out on the dough. Use your fingers to gently pull the sides, if needed, to enlarge the dough to the size of your baking tray.
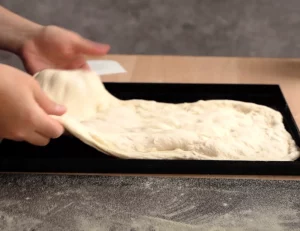
- Shake off the excess flour and transfer the stretched pizza dough to the baking tray. Use your fingertips to press or stretch gently as needed to extend the dough to the edges of the tray. If the dough won't reach the edges of the baking tray, let it rest (and rise) for 5 more minutes. This time will let the dough both relax and proof a bit longer, giving you more dough to work with. At this point, you should be able to reach the sides of the tray.
Bake the Pizzas
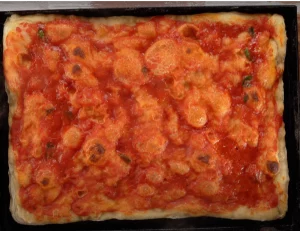
- Add any condiments to the stretched pizza dough (except cheese) and…Bake the pizza (one at a time) in a pre-heated 572°F (300°C) 'static' oven for 9 minutes. Or, bake at 500°F (250°C) for 15 minutes. You want to bake at the highest temperature that your oven will allow. Bake the pizza in the lower third of the oven. Better yet? Pre-heat the oven with a baking stone sitting on the oven floor or on the lowest rack of the oven. To bake the pizza, we set the pizza (in the baking tray) directly on the baking stone.
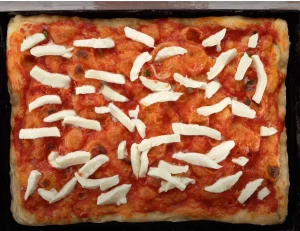
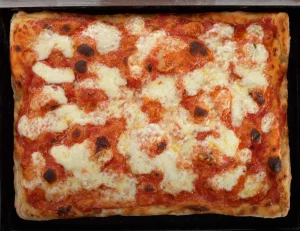
- Add any cheese and return the pizza to the oven for 3 minutes—this time on 'fan' (convection) if your oven has that setting. Finishing on 'fan' just helps the pizza crust to crisp up, if you like that texture.
- Finish the rest of the pizzas in the same way and… Buon appetito!
bellissima pizza! complimenti! 👋👋
Original comment: View on YouTube
Ciao, perché scegli di non mettere olio nell’impasto? Cosa cambia? Grazie
Original comment: View on YouTube
Ricetta spiegata bene e semplice da realizzare. Ho un solo dubbio: le dosi per le 3 teglie non mi tornano, infatti non mi sono uscite tre teglie, le proporzioni, confrontate alle dosi per 1 e due panetti non corrispondono. Dovrebbero essere 1100 di farina e 770 di acqua. Infatti quando ho pesato i panetti, sono riuscita a farne due da 600, mentre uno era da nemmeno 500. A parte questo, il procedimento è andato tutto bene ma arrivata alla stesura, seguendo quanto detto, ovvero di non schiacciare al centro della pizza una volta messa in teglia, il centro è rimasto altissimo e non è venuta alveolata.P.s. un piccolo suggerimento per chi legge. Io ho usato la Vigevano pizza in teglia come farina, è molto buona, si lavora bene, ma è già saporita di suo, quindi suggerisco di diminuire la quantità di sale se si usa questa farina.
Original comment: View on YouTube
Grazie per la ricetta. L’acqua dell’impasto va inserita tiepida, ambiente o fredda?
Original comment: View on YouTube
Ciao , ho eseguito la ricetta con gli stessi ingredienti modalità e tempi della descrizione , avrei una domanda: nella fase di impasto quest’ultimo è risultato appiccicoso , per farlo incordare come nel video dopo 10 minuti ho dovuto aumentare sensibilmente la velocità della planetaria per incordare e anche durante i riposi nonostante sia migliorata la consistenza ho avuto difficoltà’ a manipolarlo, cosa mi consigli?comunque complimenti perché la pizza è comunque venuta ottima, Grazie.
Original comment: View on YouTube
Si, ottimo video, ma l’acqua? Tiepida a 35°? Fredda?
Original comment: View on YouTube
Ho notato tra gli ingredienti dell impasto, non hai messo l’olio… Posso chiederti come mai?
Original comment: View on YouTube
Ottimo grazie mille.. Una domanda la seconda fase di cottura se non ho un forno ventilato (siccome uso un effeuno) ho lo stesso risultato ho devo fare un cambiare i tempi e temperatura?
Original comment: View on YouTube
Domanda. Al minuto 0:45 ci sono gli ingredienti per 1, 2 o 3 teglie. Possibile che i dosaggi del lievito non crescano proporzionalmente alla quantità di farina (doppia o tripla)?
Original comment: View on YouTube
Se la temperatura ambiente supera i 28ºC (voglio dire intorno ai 32ºC) come cambiano i tempi?
Original comment: View on YouTube
Si può raddoppiare la ricetta?
Original comment: View on YouTube
Ciao posso farla lievitare di più tipo 24 ore ?
Original comment: View on YouTube
Nella ricetta dimentichi di dire a che punto mettere il sale.
Original comment: View on YouTube
Bravissimo complimenti è spettacolare ❤
Original comment: View on YouTube
Ciao, ho provato a fare la pizza. Ho utilizzato gli ingredienti della prima colonna, quello con farina a 350g di tipo 0. A me non è venuto lo stesso vostro impasto. -A me l’impasto si appiccicava tutto tra le mani. Cosa dovrei fare affinchè non si appiccica tra le mani?-Poichè fà abbastanza caldo, non ho messo durante la lievitazione l’acqua a 40°. Ho fatto la pizza dopo tre ore di lievitazione, ma si sentiva che la pizza ancora non è lievitata. In teoria, se non vorrei utilizzare l’acqua quante ore dovrei aspettare affinchè finisse di lievitare?-che cosa significa 4 g di lievito fresco – 2 grammi di lievito secco? io ho utilizzato il lievito di birra in bustina ?
Original comment: View on YouTube
Se anziché una farina 0 , uso una farina 1 con W medio alta , cosa cambia?
Original comment: View on YouTube
Quella non arriverebbe fino a tavola !!! Davvero complimenti per il risultato!!! 👏👏👏
Original comment: View on YouTube
La teglia va oliata? Che differenza c’è tra cuocerla in statico e ventilato?
Original comment: View on YouTube
Thank you for sharing. I tried it and everyone was pleased.Can I freeze somenof the dough (in case I’m making the 3 pizzas batch)? If so, when?Thank you
Original comment: View on YouTube
Si deve posizionare in platea x la 1ma cottura in forno? Avendo uno elettrico max 250°?
Original comment: View on YouTube
Mi è stato regalato un forno elettrico Ariete “Pizza in 4 minuti” che non ho ancora mai usato. Sarebbe possibile usare questa ricetta ad alta idratazione e poi cuocere la pizza col forno di cui sopra? Eventualmente ci sarebbe qualche modifica da apportare alla preparazione dell’impasto? Grazie mille
Original comment: View on YouTube
pizza bellissima, ma pomodoro asciutto!
Original comment: View on YouTube
ciao, al supermercato non ho trovato nessuna di queste farine, quale posso prendere che vada bene?? indicativamente qual è la w che deve avere?
Original comment: View on YouTube
Thank you for sharing. Plus also having captions in English. 🙌❤️
Original comment: View on YouTube
ciao. se a temperatura inferiore ( circa 20 gradi) aumenterà di molto il tempo di lievitazione?
Original comment: View on YouTube
Ciao. Una farina Tipo 0 con 11,5 % di proteine va bene?
Original comment: View on YouTube
Finalmente una spiegazione superfacile,grazie.Ti ho trovato per caso e ne sono contentissima, adesso vado a fare limpasto.Una domanda ma nei due contenitori per la lievitazione hai messo dell’olio?
Original comment: View on YouTube
ciao complimenti sembra buonissima! proverò 😋😋😋 posso chiederti a che altezza metti la teglia nella prima cottura e seconda cottura? uso forno classico grazie
Original comment: View on YouTube
Dopo aver impastato il tutto viene abbastanza “liquida”, è normale?
Original comment: View on YouTube
Mmmmh😊
Original comment: View on YouTube
Ho trovato per caso questo video,alla ricerca dell’ennesima pizza davvero croccante.. e niente l’ho trovata finalmente! 😍Ricetta spaziale!! Pizza super croccante,e lo dice una che di pizza non va matta. Complimenti!!
Original comment: View on YouTube
Salve una caputo pizzeria 00 da 260-280 W va bene o devo miscelarla con una percentuale di manitoba? Se si quanta? Grazie
Original comment: View on YouTube
Se uso lievito secco bastano 2gr??grazie
Original comment: View on YouTube
Per una volta trovo un video perfetto: spiegato benissimo, con tutte le spiegazioni e dosi. Complimenti davvero 😍 proverò a farla 😍
Original comment: View on YouTube
Va bene usare una farina tipo 1? La ricetta con 350 di farina quante ore deve lievitare? Grazie
Original comment: View on YouTube
Video molto chiaro e ricetta super, sarebbe pero possibile avere una spiegazione piu dettagliata riguardo alla parte dei 28 gradi lievitazione e bacinella nel forno, qual e la procedura corretta per ottenere i 28 gradi dentro al forno? Grazie
Original comment: View on YouTube
Era tutto bellissimo fino alla temperatura di 28. Come si puo mantenerla con una bacinella di acqua calda a 45 gradi x 2 ore? Sarebbe stato fantastica la versione senza inpastatrice
Original comment: View on YouTube
Ricetta semplice ma efficace … Bravi
Original comment: View on YouTube
Praticamente come se stessi facendo un impasto di lunghissima lievitazione…tipo24/48/72 ore…
Original comment: View on YouTube
Ciao…finalmente ho trovato la ricetta perfetta(a mio avviso)della pizza in teglia veloce…l’ho già provata e devo dirti che è molto buona….
Original comment: View on YouTube
complimenti!!!! anche questa da provare.Felice di essere capitata nel tuo “piatto” ciao😘😘😄
Original comment: View on YouTube
Sito molto bello, riprese accattivanti, complimenti. Non mi è chiaro perché nelle dosi per ottenere 1, 2 o 3 teglie le quantità per le 3 teglie non sono esattamente il triplo di ciò che è previsto per una teglia. Grazie in anticipo oer il chiarimento e ancora complimenti
Original comment: View on YouTube
👍👍👍👍👍👍👍🙏
Original comment: View on YouTube
che modello di planetaria hai?
Original comment: View on YouTube
scusa che farina hai usato?
Original comment: View on YouTube
Buongiorno cercavo una pizza con tempi brevi ed eccola qua. Una domanda. In teglia olio nn si mette grazie bravi bravi….
Original comment: View on YouTube
Sarâ buonissima
Original comment: View on YouTube
Spettacolare! Bellissimo video e spiegazione! 👏👏👏
Original comment: View on YouTube
Il mio impasto non si è incordato, cosa ho sbagliato
Original comment: View on YouTube
E’ una pizza focaccia in realtà
Original comment: View on YouTube
Quanto impasto in ogni teglia ?
Original comment: View on YouTube
Un grande saluto dalla Corsica e bravo per il tuo favoloso lavoro. È fantastico mi piace molto. Fan della pizza e dell’Italia, ho un forno elettrico Euffuno p134h e vorrei un vostro consiglio per le impostazioni di alta e bassa temperatura. Grazie in anticipo. Cristoforo.
Original comment: View on YouTube
Si può fare senza planetaria? A mano per quanto tempo devo impastare?
Original comment: View on YouTube
Complimentissimi. Avrei un dubbio, la posizione della teglia in forno sia prima che dopo l’inserimento della mozzarella, è la stessa? Cioè ripiano centrale?
Original comment: View on YouTube
Buongiorno. A che punto della lavorazione sarebbe meglio aggiungere il sale per non rovinare la lievitazione?
Original comment: View on YouTube
Ciao complimenti… Posso sapere se la salsiccia e i funghi sono crudi?
Original comment: View on YouTube
Si puo impastare anche a mano? il risultato sarebbe lo stesso? grazie
Original comment: View on YouTube
Complimenti proverò grazie 😘
Original comment: View on YouTube
Per la prima cottura in forno a250^ su quale ripiano va messa la teglia? E per la seconda? Grazie
Original comment: View on YouTube
Eccellente e il caso di dire poco fumo e molto arrosto 🥇
Original comment: View on YouTube
La ho fatta, ma senza condimento, ho riscontrato un problema, al morso e alla masticazione risultava gommosa, un bel allenamento per le mascelle. Cosa causa ciò?
Original comment: View on YouTube
Buonissima ricetta
Original comment: View on YouTube
Il sale lo inserisci per ultimo? Perché non hai inserito grassi, tipo olio di oliva?
Original comment: View on YouTube
Grazie la proverò sicuramente sembra buonissima ❤️
Original comment: View on YouTube
Domanda, ma l’olio nell’impasto non va messo?
Original comment: View on YouTube
Seguo diversi canali di cucina e credo che questo, scoperto pochi giorni fa, sia uno di quelli che più rispecchiano il concetto di “canale di cucina amatoriale” così come concepito e ricercato dalla maggioranza degli utenti su YouTube. La descrizione delle ricette è minuziosa e pone la giusta enfasi su quei passaggi “delicati” che fanno la differenza nella buona riuscita di una preparazione. Inoltre la qualità delle riprese e dei montaggi video è notevole e le musiche non sono per nulla dozzinali.Però, se posso fare un commento costruttivo, penso che il canale crescerebbe più rapidamente se si desse maggior rilevanza alla componente “d’intrattenimento”, anche andando a sacrificare un po’ il lato tecnico. Per esempio, come prima cosa, proverei ad includere nelle inquadrature il volto di chi cucina o ad alternare delle spiegazioni “live” al commento della voce fuori campo. Capisco l’intento di focalizzarsi sul “Piatto”, come esplicitato dal nome stesso del canale, però, a mio avviso, questi sono dettagli da non trascurare per assicurarsi un maggior seguito ed una migliore fidelizzazione del pubblico su YouTube.Video-ricette di questa qualità meritano di arrivare ad un pubblico più vasto. Saluti!
Original comment: View on YouTube
La devo provare! Avete anche la ricetta per la pizza a lunga lievitazione? Io ricordo che mettevo l’impatto in frigo tutta la notte e poi lievitavo anche i singoli panetti…
Original comment: View on YouTube
Sempre molto chiaro e coinciso….La proverò sicuramente
Original comment: View on YouTube
Buongiorno, grazie mille…avevo richiesto questo video con lievitazione veloce e mi avete accontentato…oggi provo questa pizza in teglia …
Original comment: View on YouTube
Ottimo scusa ma la teglia non va oleata si può usare carta forno grazie
Original comment: View on YouTube
Niente olio? Posso aggiungere malto in polvere?
Original comment: View on YouTube
Buongiorno,2 domande, 1) perche sei partito inserendo prima tutta l’acqua ed inseguito la farina al contrario di come di usa fare di solito? 2) hai sempre impastato in macchina a bassa velocità per tutto il tempo!
Original comment: View on YouTube
Marca di farina usato in questo video? Bel impasto! Complimenti
Original comment: View on YouTube
Scusate come può essere digeribile come una fatta maturare più ore ?!
Original comment: View on YouTube
Siete fantastici 👍👍💯💯io ho già Fatto la pizza ad alta idratazione e l’anno fatta fuori tutt, sublime grazieee, adesso farò anche questa, complimenti e chiarissimi sulla spiegazione e procedimento. 🥰😋😋😋
Original comment: View on YouTube
Dimenticavo di dire che pensare al profumo della pizza che invade la casa è amore per la famiglia la nostra Italia
Original comment: View on YouTube
Delicious! I’m gonna make it now!!! 😁😘
Original comment: View on YouTube
Grazie per tutti i vostri consigli siete grandi👏👏 vi farò sapere
Original comment: View on YouTube
Hai provato a fare la tua PIZZA VELOCE? Facci sapere come ti è venuta!
Original comment: View on YouTube
Bene volevo fare la pizza per cena e grazie a voi e alla mia 😁 fortuna nel trovare subito la vostra ricetta che sempre chiarissima ciao alla prossima
Original comment: View on YouTube
VA BENE KAMUT MANITODA CON UN PO DI TENERO 00 SI O NO
Original comment: View on YouTube