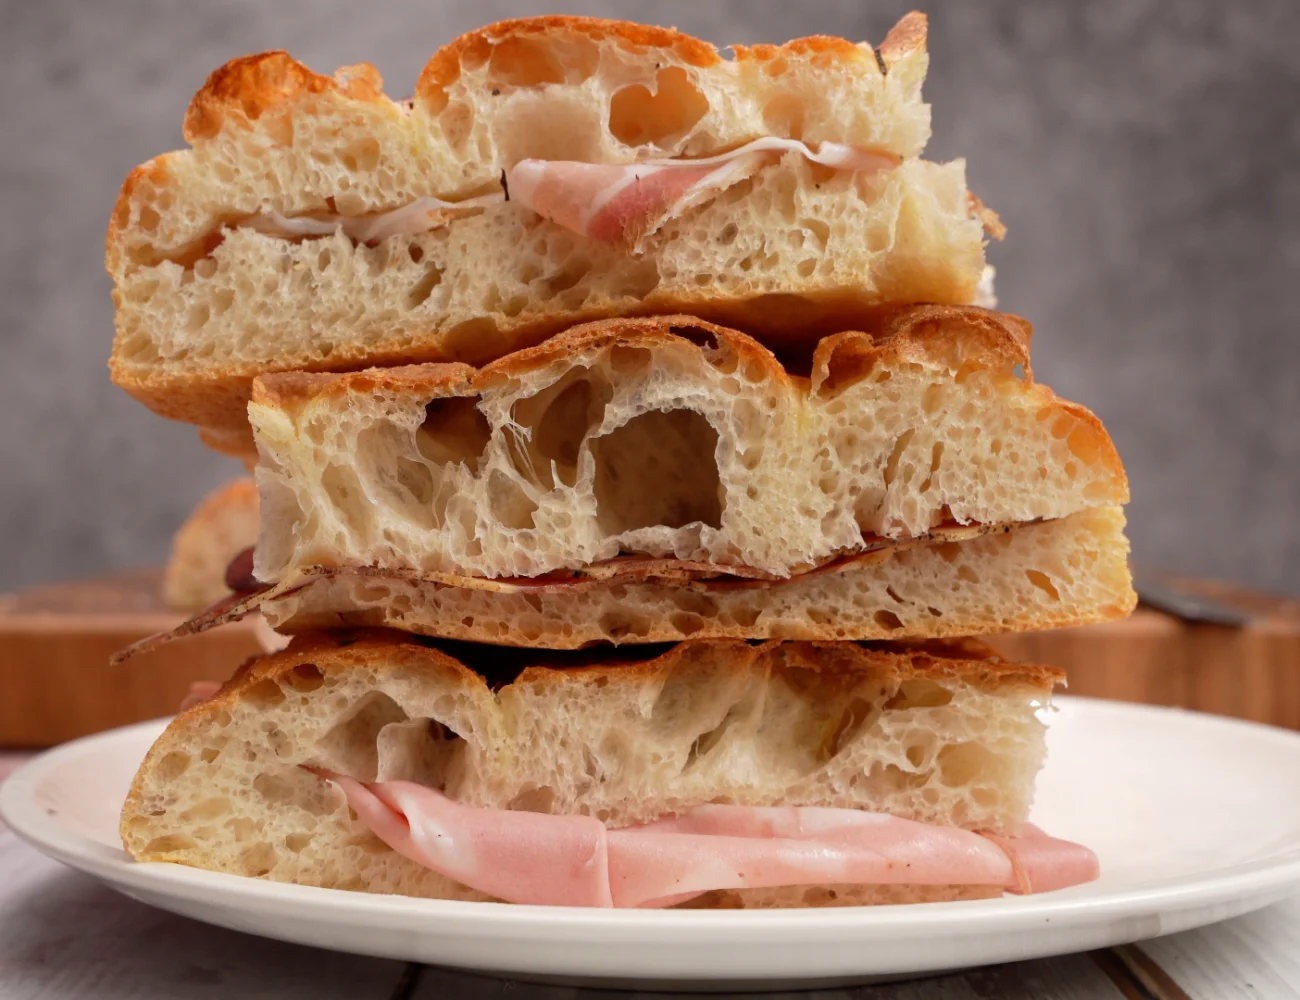
Hate kneading dough but want delicious focaccia? Our NO KNEAD focaccia bread recipe is to die for! You will need to use your hands to make a few simple folds. This bread dough— with 85% water— is a HIGH HYDRATION dough that produces a tall, soft focaccia. It is perfect to use as sandwich bread or just a good old fashion Italian scarpetta.
Keep scrolling to read our No Knead Focaccia Bread recipe below, or watch our video recipe!
Watch the Video Recipe!
Learn how to make No Knead Italian Focaccia in this video recipe, filmed in Italy:
Subscribe to our YouTube Channel
More video recipes? Subscribe to our YouTube Channel (it’s FREE) and click the bell to get notifications when we release a new video recipe!
About No Knead Focaccia Bread

They say that Italy is the country of the 3 P’s: Pizza, Pane (Bread) and Pasta! But it’s also the land of focaccia bread.
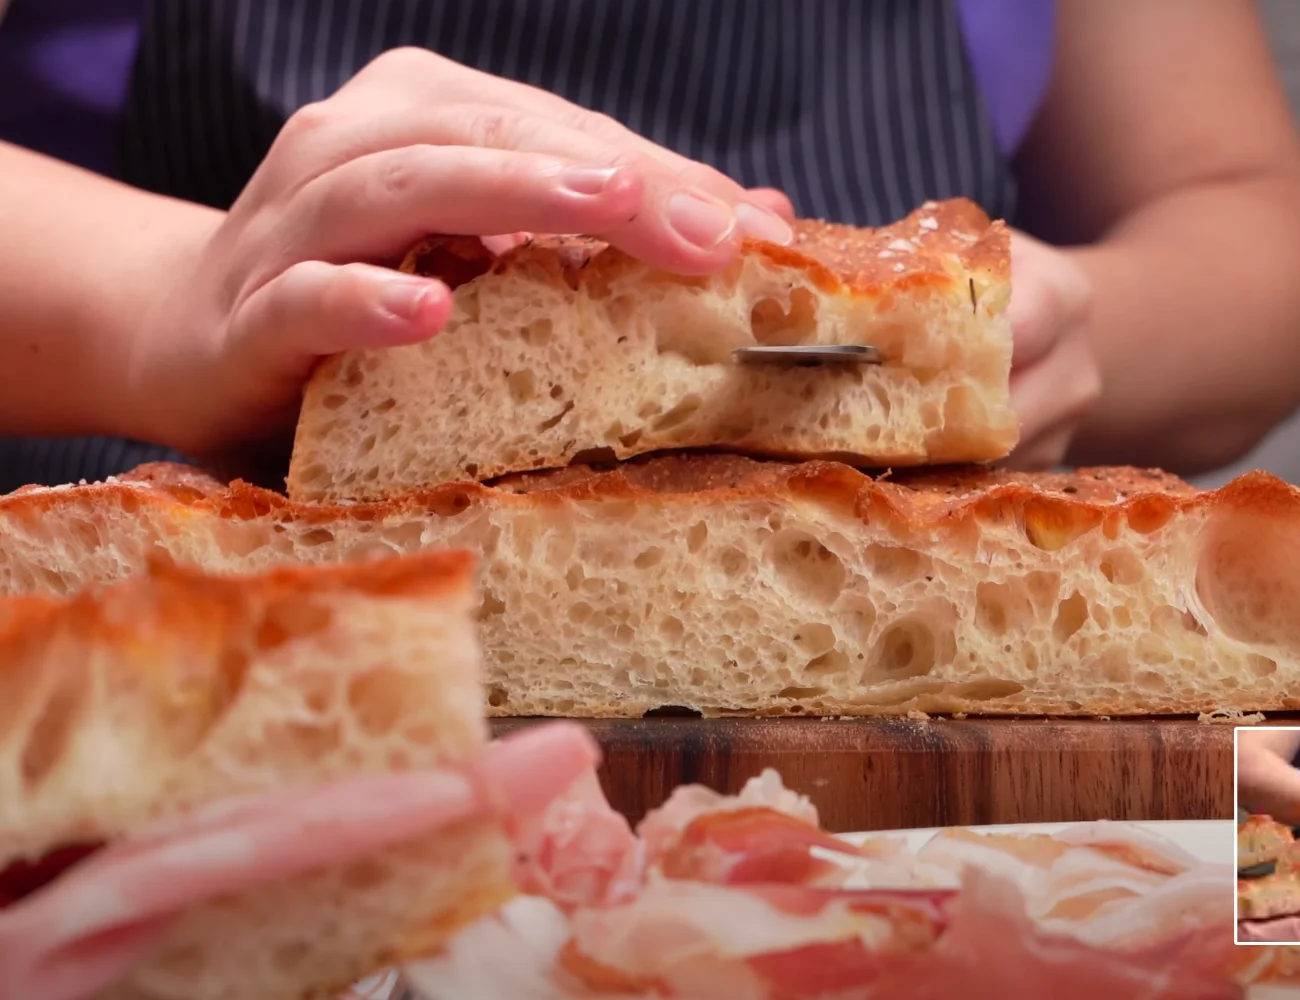
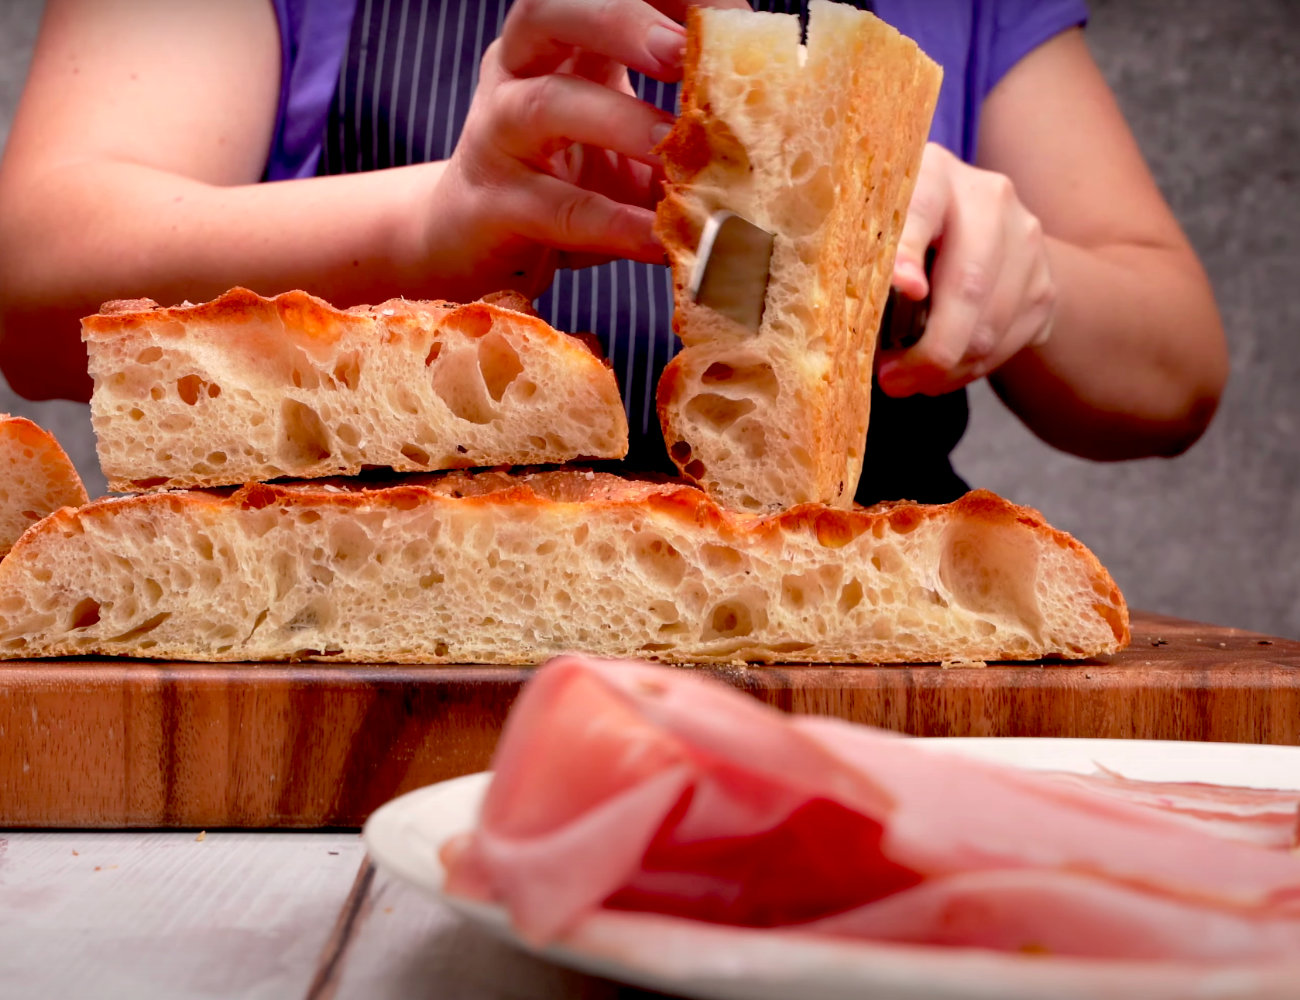
There are many varieties of focaccia in Italy, that vary by region and type. However, the focaccia bread recipe that we share with you here is one of the most popular. This focaccia recipe is ideal as sandwich bread. Tall, with a crispy crust and so soft inside —with big bubbles and a great texture.
The secret? A high hydration dough (85% water). Thankfully, the tastiest focaccia is also the easiest to make. We’ll show you how to make this focaccia recipe without kneading with your hands or a stand mixer. A few simple folds is all you need to create a lovely structure that will blow your mind.
Have you had trouble working with high hydration dough in the past? For instance, do you have a hard time working high hydration pizza dough? Check out the video recipe above to see how easy it is to work with this type of dough.
Focaccia Bread Recipe Ingredients
- flour (bread or pizza): roughly 5 cups (600 g) —we recommend weighing ingredients
► WHAT WE USED (affiliate link): Caputo Chefs Flour for Pizza and Bread (2.2 LB; Case of 10): https://amzn.to/3F8vo77
- dry yeast: 3 g (1 tsp)— 0.5% the weight of the flour
► WHAT WE USED (affiliate link): Caputo Active Dry Yeast: https://amzn.to/3q67eWq
- water: 310 g (1 1/3 cups)
- whole milk: 200 g (3/4 cup)
- olive oil: 10 g (1 tbsp)
- salt: 15 g (2 1/2 tsp)— 2.5% the weight of the flour
TOPPING OPTIONS
- rosemary (optional)
- salt: coarse or flake
Which Flour to Choose?
For high-hydration doughs—greater than 80%—you should use a strong flour. In other words, you should use a flour with high gluten content.
The strength of flour is represented by a “W” on flour products. Strong flour should have a “W” greater than ‘300.’ This strength of flour can hold a lot of water and still maintain its structure.
Avoid Weak Flours
Do not choose a weak all-purpose flour for this no knead focaccia recipe. With this amount of water, it will be difficult to get a great rise. If you would like the results you see in the photos and video— soft inside with a great crunch outside—choose a strong flour as we’ve suggested.
Specific Flours We Love!
We have tried many flours when making focaccia bread recipes and pizza dough. Our absolute favorite (up till now) has been a brand of flour that is famous in pizzerias in Italy: Caputo (affiliate link)!
Here are the products that we used in the video to make our No Knead Focaccia Bread recipe. These are Amazon affiliate links, since this brand is not usually found in supermarkets (even in Italy) :
- Caputo Chefs Flour for Pizza and Bread (2.2 LB; Case of 10): https://amzn.to/3F8vo77
- Caputo Active Dry Yeast: https://amzn.to/3q67eWq
- Caputo Semola Flour: https://amzn.to/445b1rm
Proofing and Yeast Quantities
The amount of yeast is calculated for the length of time that you plan to proof. This focaccia bread recipe is designed to proof 6-7 hours at a temperature of around 70°F (21º C).

How to Make No Knead Focaccia Bread
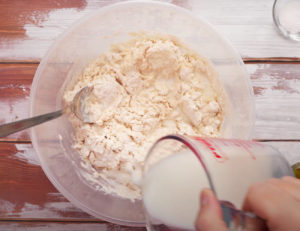
Combine the Liquids
To make this No Knead Focaccia Bread recipe, we start by combining the liquid: water and whole milk. The liquids in total represent 85% by weight with respect to the flour.

We will be adding some extra virgin olive oil as well, which we have not counted as a liquid. It is usually not counted in the hydration percentage.
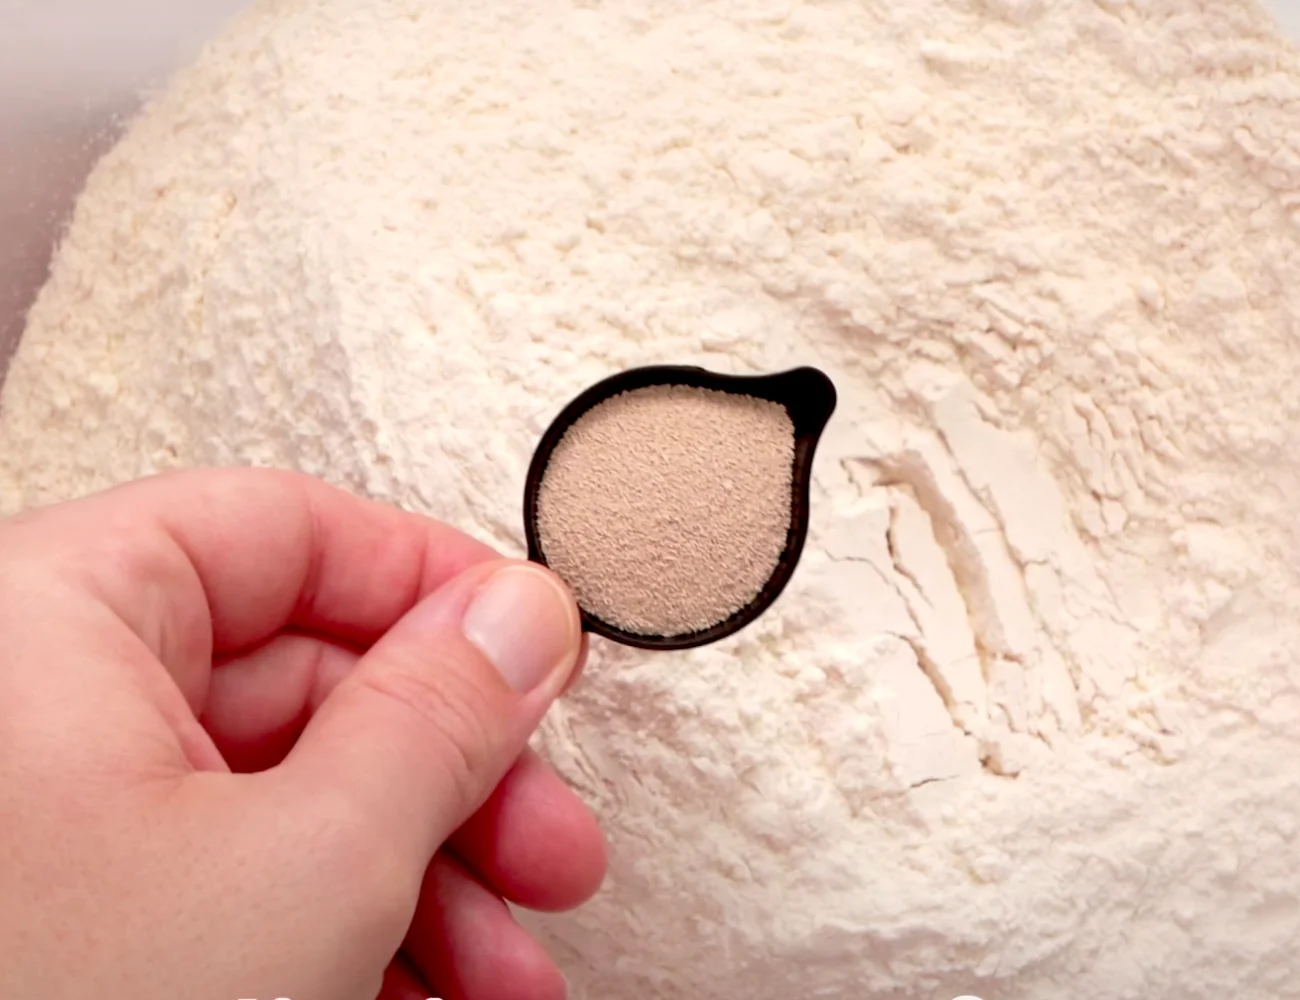
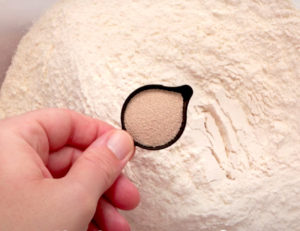
Combine the Flour and Yeast
Then, add the flour. Since we’re making a highly hydrated dough, we need a strong flour —a bread or pizza flour. The ‘W’ should be least 300 if not more, as we previously discussed.
Add the yeast to the flour and mix it well. We use a brand of yeast that we can mix directly into the flour. Because it’s already activated, we need just 3 grams (about 1 teaspoon) —for a rise of about six to seven hours at a temperature of about 70° fahrenheit ( 21° celsius).
Make the Dough
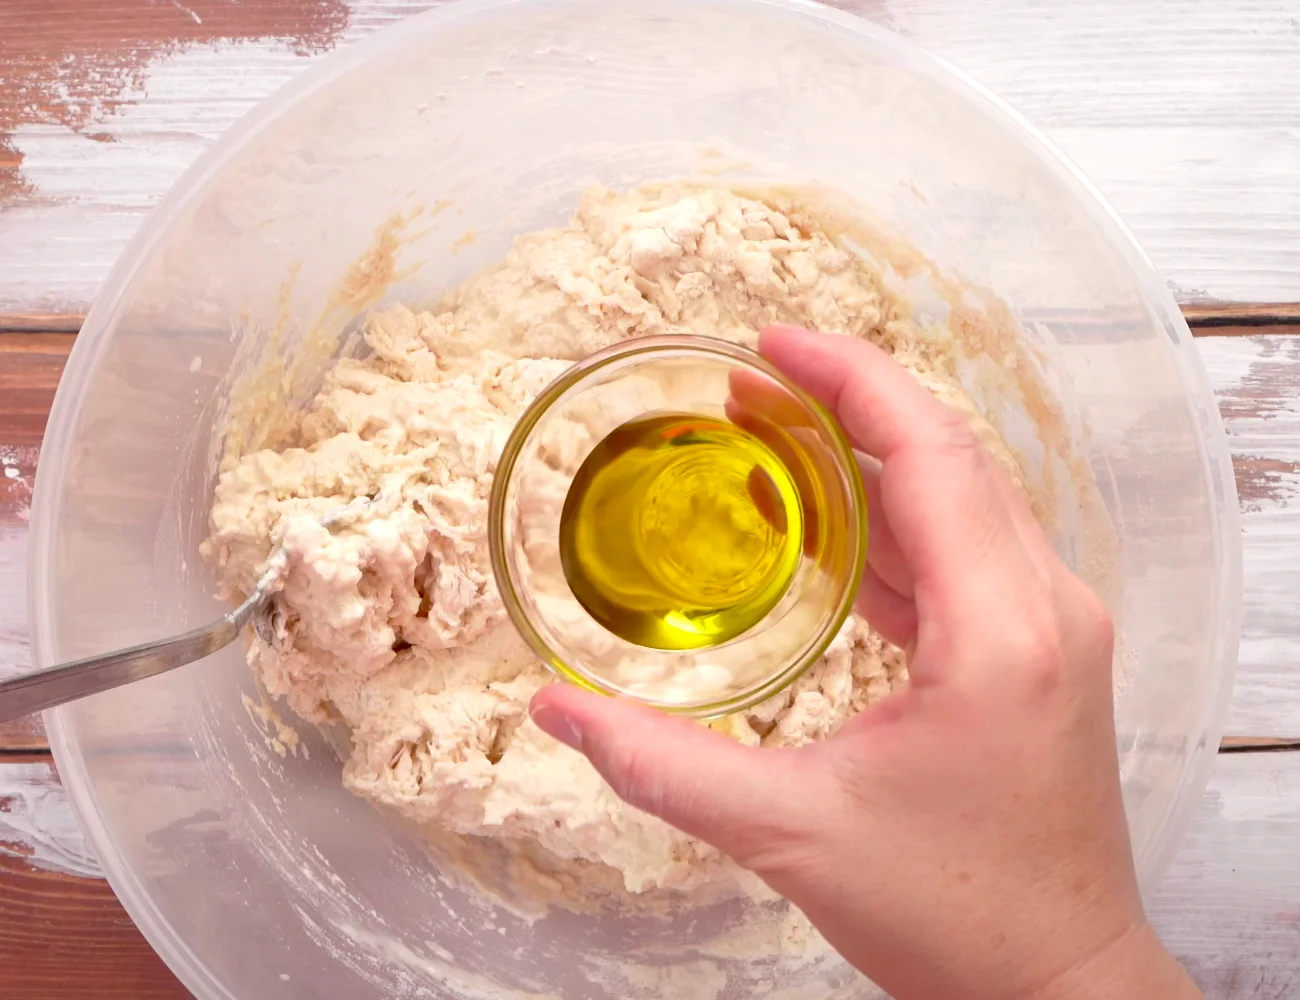
Add the liquids to the flour and yeast. You can simply use a large spoon to do this job.

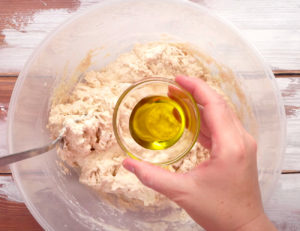
Then add the olive oil.
After the mixing is done, mix in the salt as well. Salt can inhibit yeast, so we don’t want to add salt and yeast next to one another at the beginning.
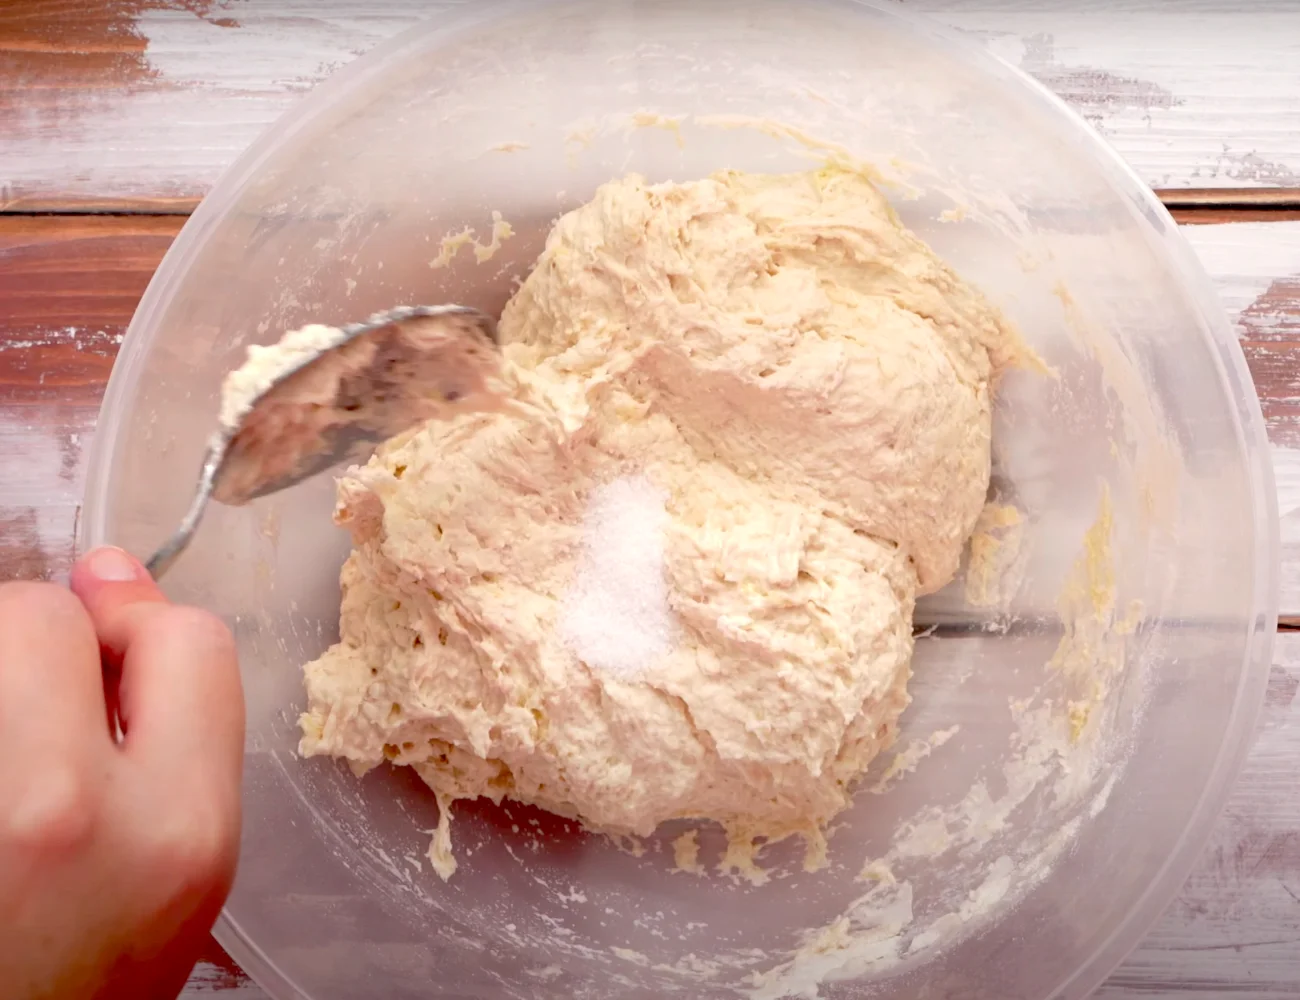
Due to the high hydration, this is a focaccia bread that will not require any manual kneading or stand mixers. The dough itself will do the work for us.
Let it rest (covered) for about 20 minutes.
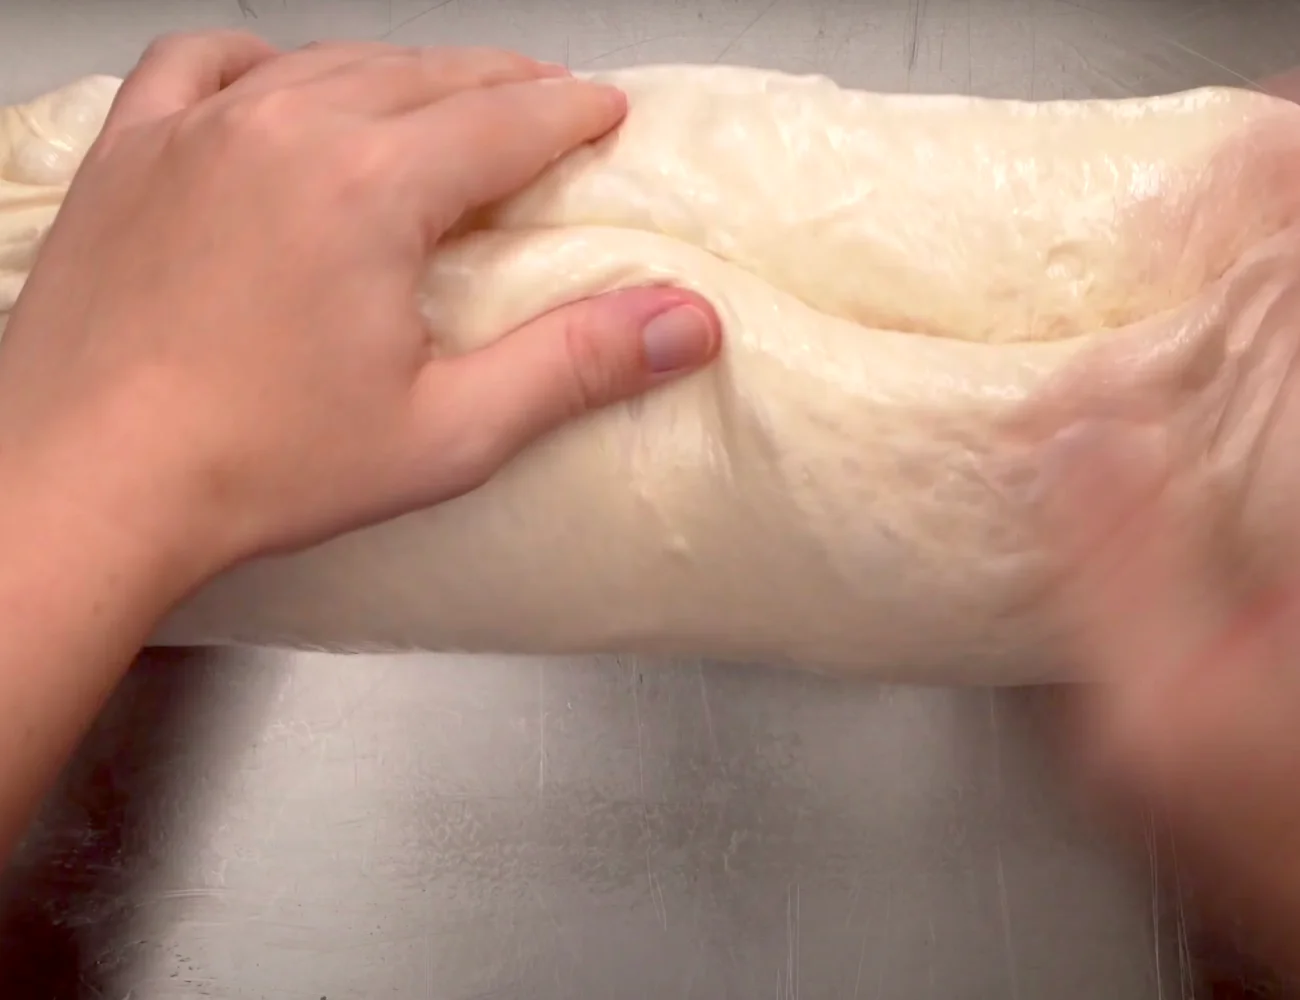
Then, we just need to make a series of easy folds to give our focaccia a shape that can trap air! This is a lot less work than kneading, and it is perfect for bread beginners!
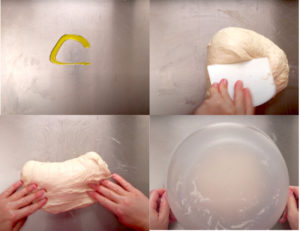
How to Work with Sticky High Hydration Dough!
There’s no changing the fact that high hydration dough is sticky! However, by adding a small—SMALL— amount of olive oil to the work surface and your hands, we can easily work with it.
3 Rounds of Folds- Every 20 minutes
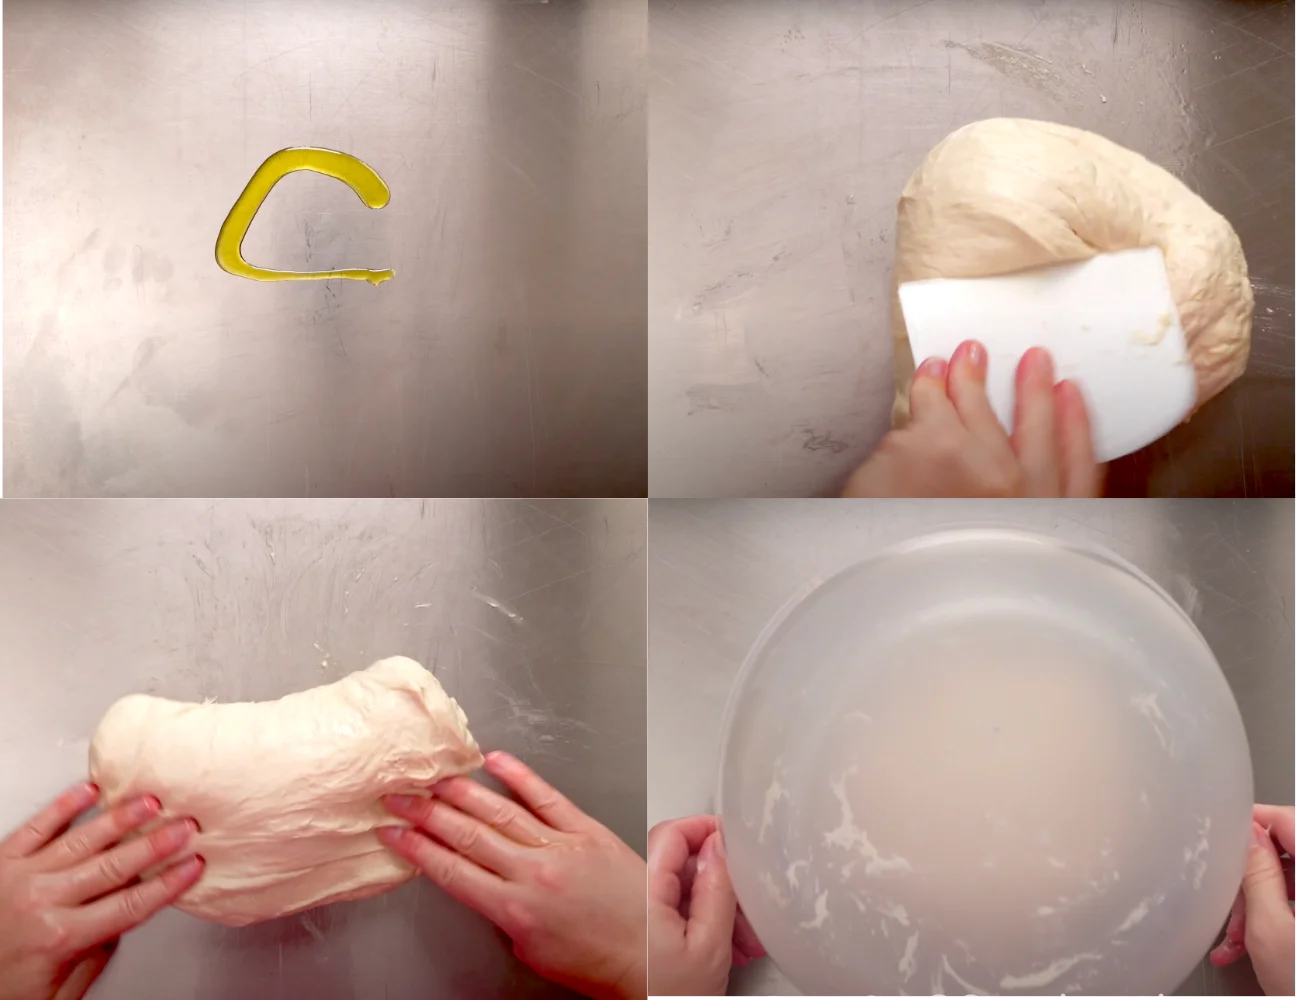
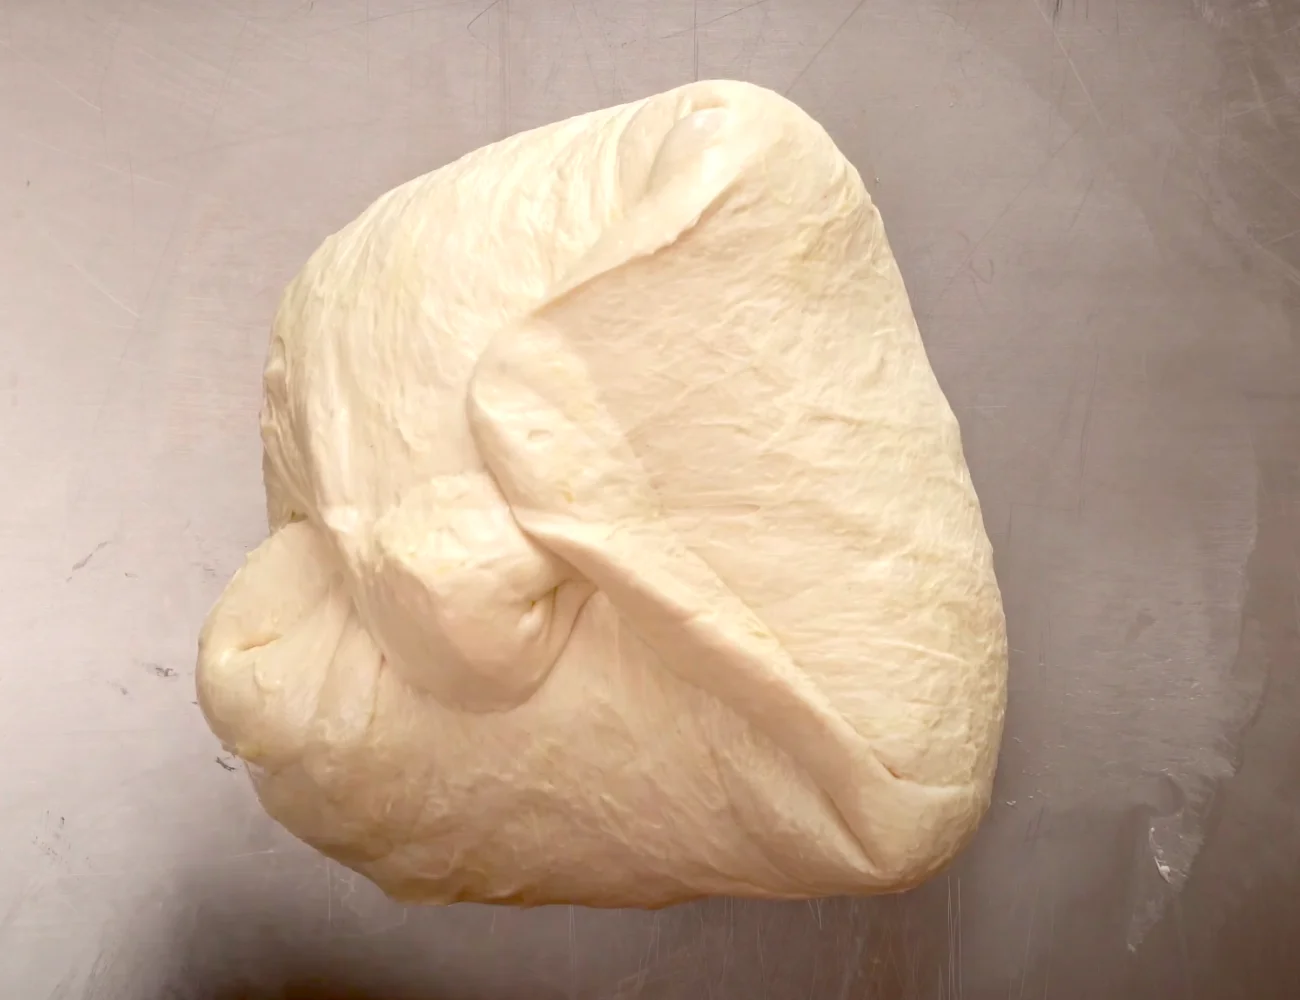
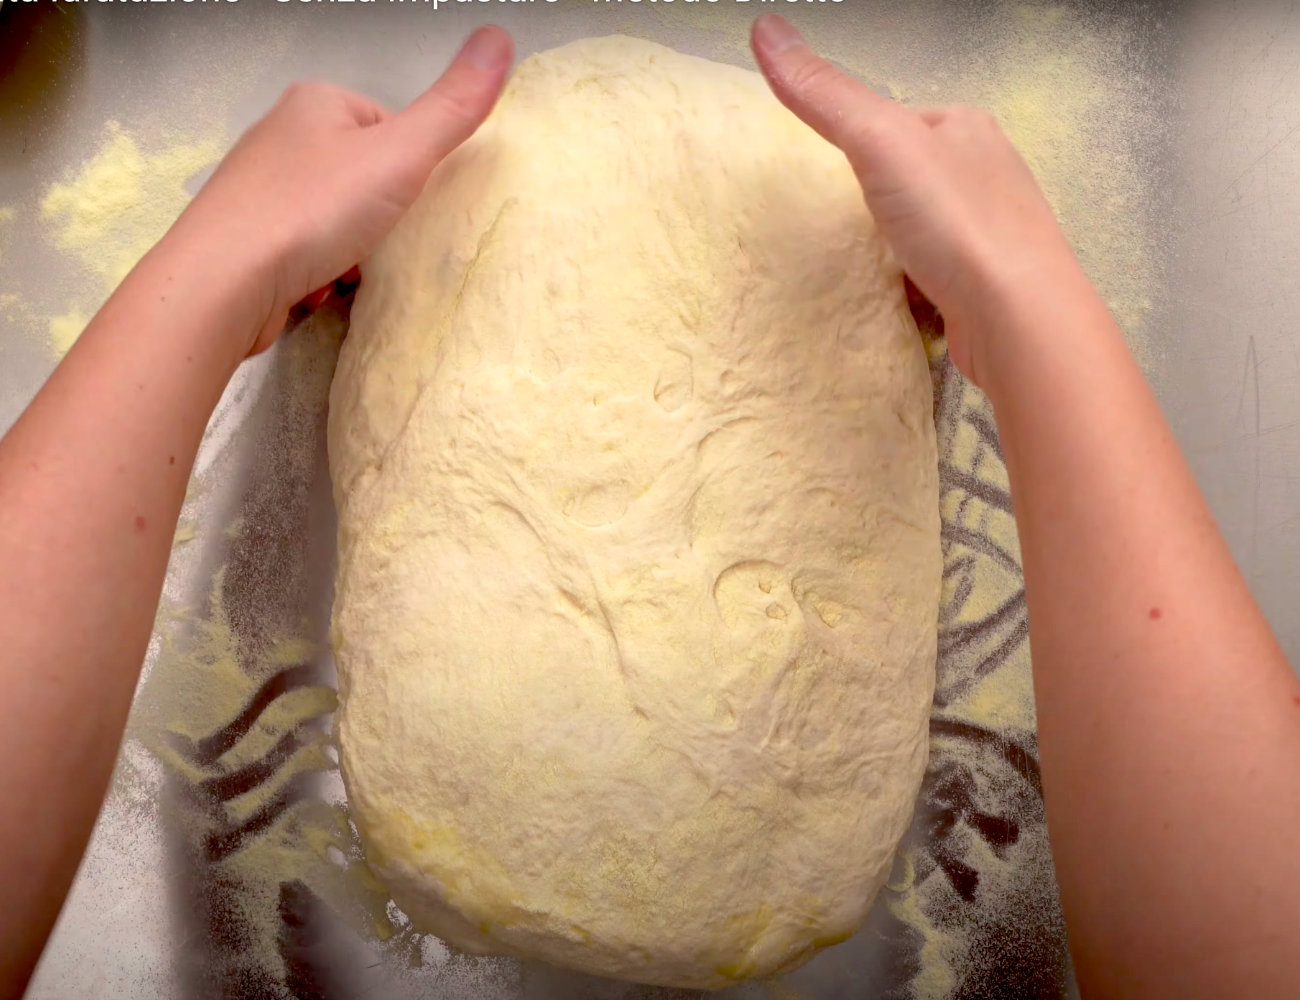
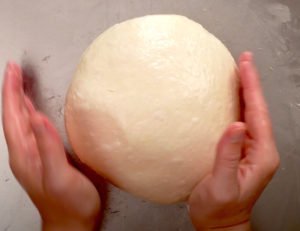
Start making a round of folds. Use whichever technique you prefer. It is not how you make the folds, but the result that matters here. We are simply looking to give the dough a rough ball shape. Keep folding—book, letter folds, whatever—until you can’t fold any more.
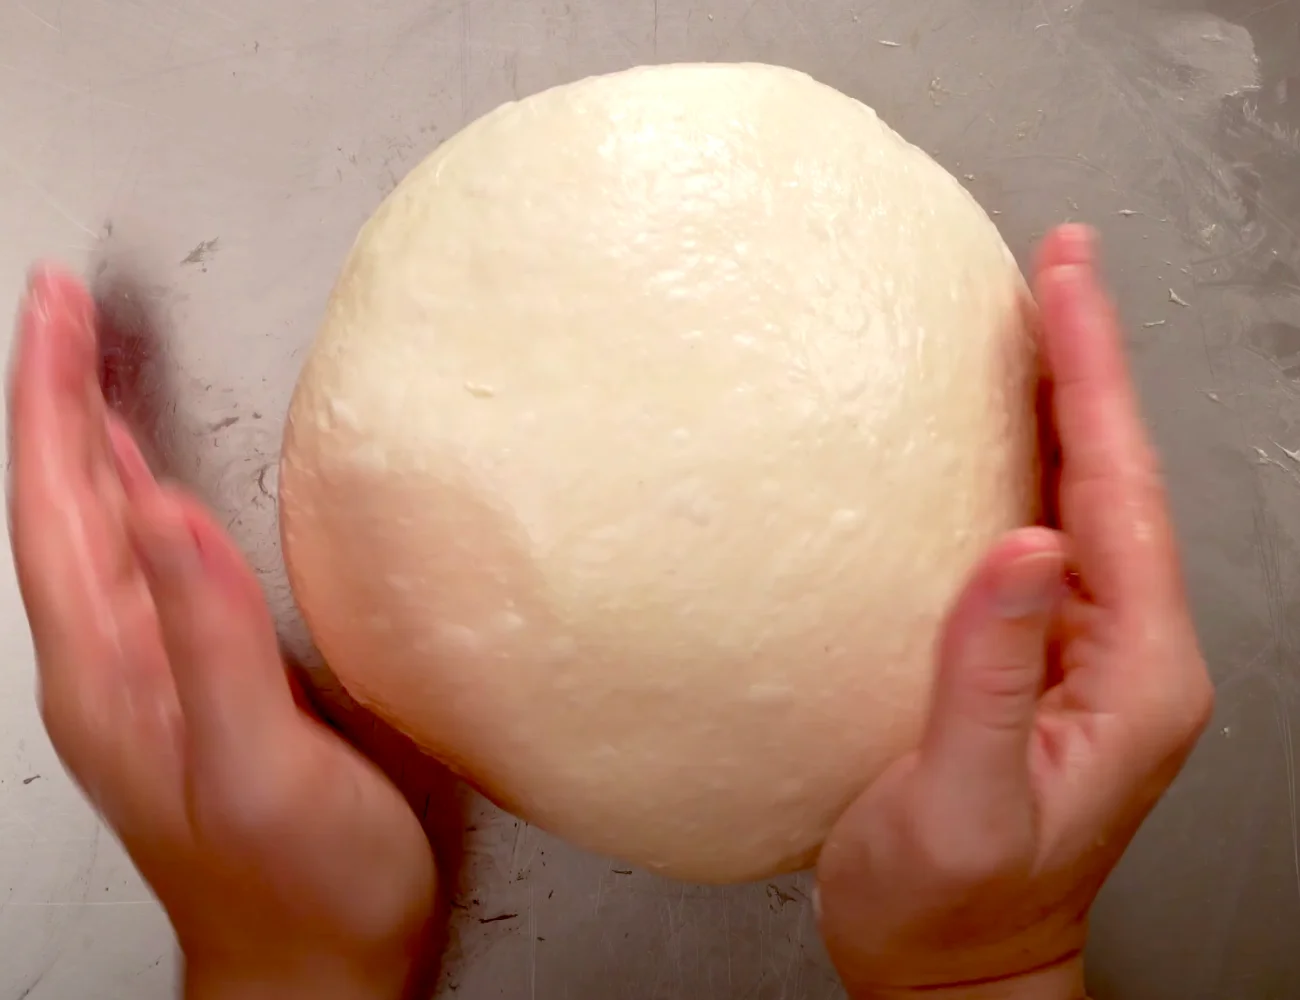
Our focaccia dough won’t be a perfect ball yet —it’s still too wet. No problem! We will repeat the process two more times, and each time the dough will take on a better shape. Please watch our video above—a video is worth a thousand words!
Cover and let the dough rest for 20 minutes. Then, give the dough another round of folds.
Cover again, let the dough rest for 20 more minutes and give it a final round of folds!
Why Are Folds Necessary?
Imagine that your gluten is like cement. Want to make a wall of cement? Poured cement alone will run and create an amorphous shape—not useful! However, if you create a structure in which to pour the cement, then it will dry into a useful shape.
The same applies to dough. We fold to give our gluten a structure in which to grow. The gluten mesh that develops in this way will increase the strength of our dough which otherwise would collapse. It’s this structure which gives our focaccia recipe the lovely big bubbles you see in the pictures!
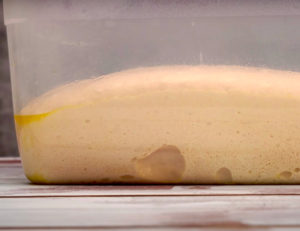
1st Dough Rise— Container
Cover and let the dough rest for two hours —or until it doubles in size!
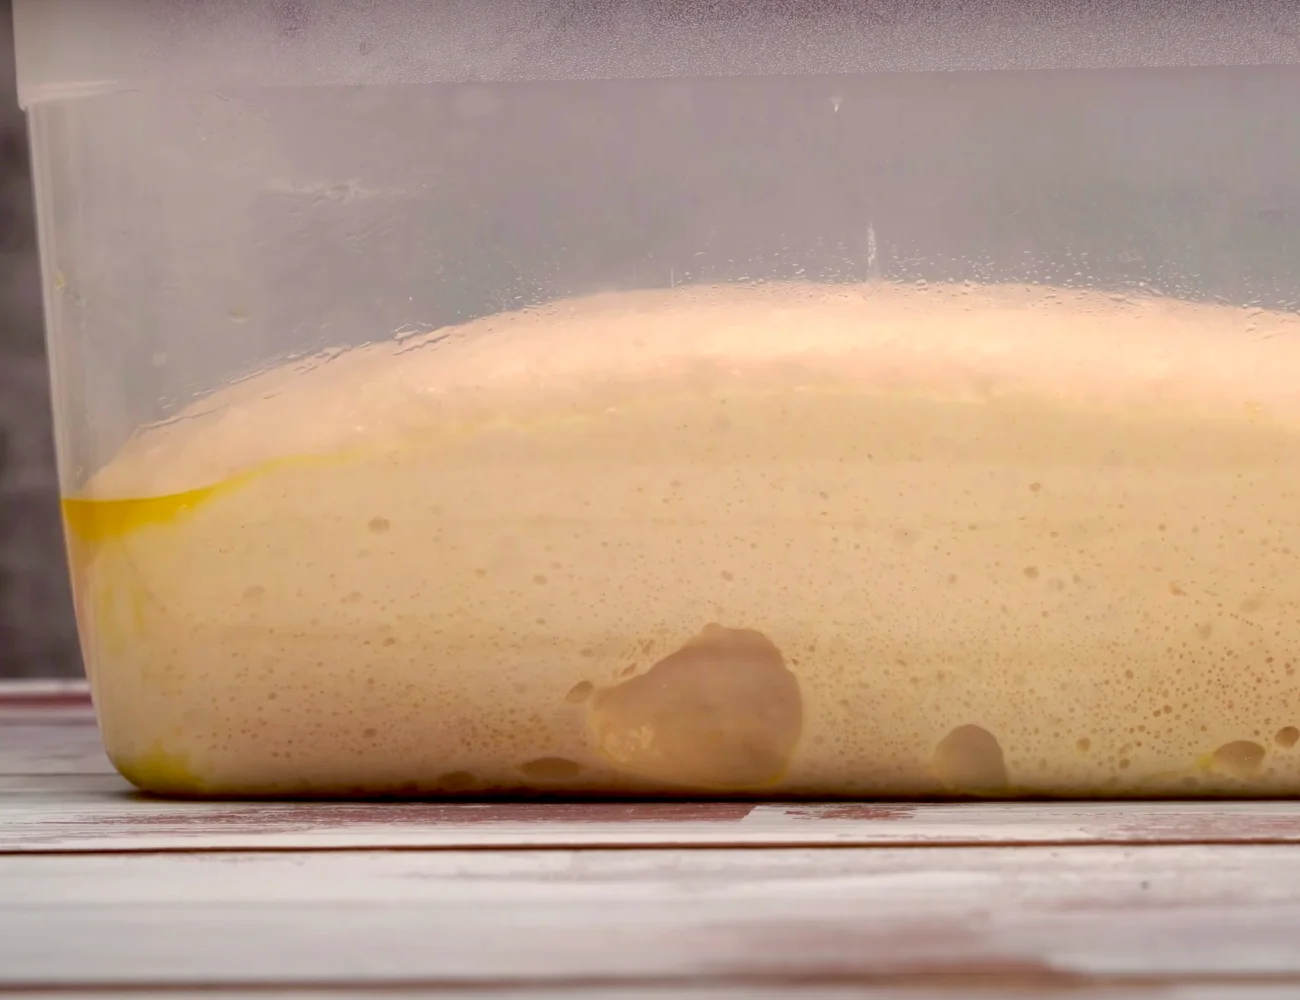
Believe it or not, the shape of the container that the dough rises in does matter here! It’s best to choose a container with the same rough shape as the pan you plan to bake the focaccia in. Here, we will bake in a rectangular baking tray, so we are letting the dough rise in a rectangular container.
It’s not critical to choose a container with the same shape as your baking tray. However, if you do, stretching the dough to the size of the baking tray will be much, much easier!
More Folds!
Time to make our last round of folds. Add a tiny bit of oil to the work surface as always. Turn the container over and just let the dough slowly slide out onto the work surface. It will be full of air!
Fold the dough in on itself a few more times to trap even more air. Continue folding the dough until it is really filled with air like a balloon that is about to burst.
When you struggle to make any more folds, that is the time to stop. Place it back in the covered container and let the focaccia dough rest for another hour to let it relax a little bit.
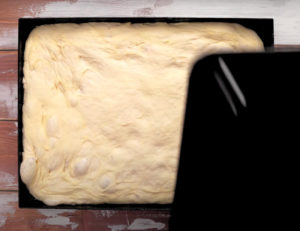
2nd Dough Rise— Baking Tray
After the hour, transfer the dough to your work surface —this time dusted with semolina flour. Once again, just let the dough fall from the container. Pull the dough from the edges to stretch it to roughly the size of the baking tray.
Then, transfer the dough to baking tray for the second rise.

The focaccia dough may still spring back a bit when you try to stretch it. This is normal given the amount of folds that we gave it. And remember: our dough still has to rise in the pan during which time the gluten will also continue to relax.
Cover the let the dough rise for 2 more hours.
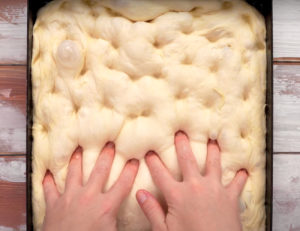
Bake the Focaccia Bread
Time to bake! Now’s the time to prepare any toppings you like: for instance, rosemary and coarse or flake salt.
It’s finally time to make the famous fingertip indents that are typical of Italian focaccia bread. If necessary, wet your fingers with oil. Press down and away from you to make the indents.
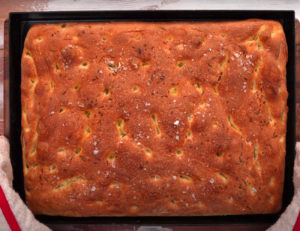
Bake the focaccia in a static, preheated oven at 430° F (220° C) for 20 minutes.
Then—if you have this oven option—finish baking the focaccia bread at the same temperature using convection or fan for about 10 more minutes. This will create an even crispier outer crust. We want the focaccia browned—not burned— so watch the bread carefully at this point and judge by eye.
Our beautiful focaccia is ready! It’s a focaccia that was created to be stuffed with something delicious! We love to fill ours with cold cuts ( affettati in Italian)—such as mortadella which is not the bologna found abroad.
You can even stuff the focaccia with vegetables! Try broccoli rabe (cime di rapa in Italian) or a combination of vegetables and meat. For example, spinach and sausage are a delicious mix. Buon appetito!
Discover More Italian Focaccia Recipes!
Discover More Italian Food Recipes
As an Amazon Associate, we earn from qualifying purchases. This means at no extra cost to you, PIATTO may earn a small commission if you click the links and make a qualifying purchase.
No Knead Focaccia Bread Recipe
Equipment
- 1 pastry cutter optional
- 1 large mixing bowl
- 1 large proofing container rectangular for a rectangular bake
- 1 baking tray
- 1 kitchen scale optional but recommended
Ingredients
- 5 cups strong flour bread or pizza (see notes)
- 1 tsp dry active yeast
- 1 ⅓ cup water
- ¾ cup whole milk
- 1 tbsp olive oil
- 2 ½ tsp fine salt
- fresh rosemary optional topping
- coarse or flake salt optional topping
Instructions
Make the Focaccia Dough
- Combine the water and milk (liquids) in a small bowl or cup.¾ cup whole milk, 1 ⅓ cup water

- Combine the yeast with the flour in a large mixing bowl.1 tsp dry active yeast, 5 cups strong flour
- Slowly add the liquids to the dry ingredients, using a large spoon to combine the ingredients.
- Mix the olive oil into the dough.1 tbsp olive oil
- Mix the salt into the dough.2 ½ tsp fine salt
- Cover and let the dough rest for 20 minutes to relax.


Fold the Dough (3x)
- Transfer the dough to a very lightly oiled work surface. Using lightly oiled hands and / or a pastry cutter, give the wet dough a round of folds. Cover and let the dough rest on the table for 20 minutes.
- Do a 2nd round of folds. Cover and let the dough rest 20 minutes.
- Do a 3rd round of folds. Transfer the dough to a rectangular container for the first rise.
1st Dough Rise (Container)
- Cover the dough and let the dough rise until doubled in size—a few hours.
- Transfer the dough to the work surface and give the dough (now full of air) a few more folds. Then put it back in the container (covered) for another hour.

2nd Dough Rise (Tray)
- Dust the work surface with flour (semolina is best). Let the dough fall out of the container onto the work surface. Gently pull the dough to stretch it to roughly the same size of your baking tray.
- Transfer the stretched dough to the baking tray. Cover and let it rise for 2 more hours.

Bake the Focaccia
- Make indents in the focaccia with your fingertips (pushing down and away from you).
- Brush a thin layer of olive oil onto the top of the focaccia. Add fresh chopped rosemary (optional) and a sprinkle of coarse or flake salt.fresh rosemary, coarse or flake salt
- Bake the focaccia in a static, preheated oven at 430° F (220° C) for 20 minutes. Turn the oven to 'fan' and bake for another 10 minutes at the same temperature. Or, bake until golden brown. Buon appetito!
“Complimenti… è splendivigliosa 🤩😍👍”
Ottima
“Bravissimo ottimo e buonissimo. Lo rifarò. Sicuramente.. Procedimento. Ottimo. 👍💪👏👏👏😘🤩”
“L’ho fatta oggi, davvero fantastica, grazie per la ricetta!”
“Da manuale 😋😋😋”
“Provata…. PERFETTA
GRAZIE”
“L’ho fatta oggi , ottimo,alla fine sembra di avere in mano un palloncino pieno di gas elio ,come quei palloncini che vendono su le fiere . Ottimo 👍”
“Complimenti…splendida ricetta”
“Focaccia fatta con il tuo dosaggio ed é venuta buonissima 😋 il mio impasto però era più molle”
“Complimenti siete bravissimi..soprattutto per quanto riguarda riprese e spiegazioni..ottimo lavoro continuate così!!!👏👍🏻”
“Yes, for amateurs 85% liquid is already punishment. 😅 My dough takes rest in refrigerator for minimum 12 hours. But i can’t keep so air inside. 🫤 But everytime i make Foccacia, it becomes better and better. Never give up, the result is worth it. 🤤”
“Molto bravo complimenti!🎉”
“Complimenti…ne ho viste tante, ma bella come questa mai.”
“Fantastica,domani ci provo,non sarò così brava come te,complimenti x le meravigliose ricette che dai”
” 💯💯💯💯💯💯💯💯💯💯👍”
“Meravigliosa”
“Magnifique”
“Grazie per la ricetta 😀”
“Grazie mille per la ricetta sono Paola iscritta da poco ma ho replicato già due volte questa meravigliosa focaccia 😊🤗”
“Ciao , que tipo di FARINA e stato utilisato ?! GRAZIE PER LA RISPOSTA ? 🇫🇷🇮🇪🇫🇷🇮🇪👍👍👍⛱⛱⛱☀️☀️☀”
This is the kind of focaccia recipe I prefer. . .developing the structure through folding the dough as opposed to kneading. Have you tried this recipe with a pre-fermentation or even using an “old dough”?
Original comment: View on YouTube
I followed your recipee, but mine got much thinner. What is the size of your tray ?
Original comment: View on YouTube
Pure heaven
Original comment: View on YouTube
Thanks. Lardo is the best
Original comment: View on YouTube
In the process of making this right now. My dough seems wetter than yours, but it is finally starting make a ball. Thanks for the video. Subbed.
Original comment: View on YouTube
Looks easier than I bet it is! One question tho…this is the first focaccia recipe I have seen using milk…what’s the point of using milk rather than water? And would it matter if the milk was plant based? I am making bread for vegans you see..
Original comment: View on YouTube
I just put everything in my Amazon cart. I’ll give it all to my mom along with the video. She’s a carboholic….lol.
Original comment: View on YouTube
Ricetta meravigliosa !! Fatta e rifatta più volte 🙏🏻🙏🏻 grazie !!
Original comment: View on YouTube
Wow! There is nothing better then some warm fresh baked bread in a cold winter day! You make this look effortless with your presentation. I appreciate you sharing! I make cooking videos too! I love watching other talented creators to learn from each other! 👍🏻 this is inspiring!
Original comment: View on YouTube
Ohhh 😋👏 very good it is delicious
Original comment: View on YouTube
Looks great.
Original comment: View on YouTube
sei veramente un grande sono pizzaiolo da 24 anni e il risultato che ho ottenuto con il tuo impasto é il migliore cha abbia mai visto complimenti
Original comment: View on YouTube
❤❤❤❤❤❤❤ my favor
Original comment: View on YouTube
😋😋😋😋😋😋😋😋😋😋😋😋😋😋😋😋😋😋😋😋😋😋😋😋❤❤❤❤❤❤❤❤❤❤❤❤❤❤❤❤❤❤❤❤❤❤❤❤❤❤❤❤❤❤❤❤❤❤❤❤❤❤❤❤❤😋❤😋❤😋❤😋
Original comment: View on YouTube
Io ho solo il latte in casa parzialmente scremato può andare bene comunque?grazie
Original comment: View on YouTube
L’ho fatta ieri. Ho solo sbagliato l’ultimo passaggio di non aver messo il forno a ventilato. Ho usato una farina di Tipo 1 a 300W di un mulino della mia zona e il risultato è stato comunque fantastico. Lavorata facilmente, molto alveolata. L’unico problema è che è durata una frazione di secondo!!! Evaporata!
Original comment: View on YouTube
Che farina prendere??
Original comment: View on YouTube
Ci ho provato due volte ma a me non riesce; cioè non mi diventa alta ed alveolata. Ma siamo sicuri 3 soli gr di lievito per 600 gr di farina? La bustina del lievito è 7 gr per 500 gr di farina …..
Original comment: View on YouTube
Ciao…Fantastica spiegazione e la proverò di sicuro. Ma volevo chiederti, se faccio un impasto solo e poi lo uso per 3 o 4 telie, quando mi conviene dividerlo?
Original comment: View on YouTube
Foi a foccacia mais bem elaborada que eu assisti!!!❤
Original comment: View on YouTube
Stupendaaaaa ❤❤❤❤❤❤👏👏👏👏👏👏👏👏. Grazie 🙏 🙏 🙏 🙏
Original comment: View on YouTube
la voce narrante mi ricorda quella del giornalista di Radio Radio
Original comment: View on YouTube
Salve Bellissima, dimensioni teglia per favore
Original comment: View on YouTube
❤❤❤❤❤❤ Un grand merci pour la recette 😍😍❤❤❤❤
Original comment: View on YouTube
Latte di soia ?
Original comment: View on YouTube
Buon giorno, forse avete già risposto alla domanda ma ce ne sono tante e dopo un po’ mi sono fermata 😊… Potrei usare il lievito madre? E in che misure? Grz
Original comment: View on YouTube
Ciao, se si arrendono anche i pizzaiuoli vs le tue meraviglie non avrei più nulla da aggiungere. Ma che ne diresti se con farine così forti e più che alte idratazioni una passatina in frigo di 24 ore (più tempo alla maturazione) non si ottenesse più leggerezza? Ovviamente con ulteriori allunghi per lievitazione a TA.🎉
Original comment: View on YouTube
Se vorrei farla con lievito madre quanto ne dovrei aggiungere
Original comment: View on YouTube
bravissimo!!!!!!!!! stupendo!
Original comment: View on YouTube
perfetta grazie mille
Original comment: View on YouTube
non ho avuto problemi nell’impasto ma la focaccia non si è gonfiata in cottura, forse era andata oltre lievitazione?
Original comment: View on YouTube
Stupendo! Grazie! Ho fatto una pizza con questa pasta. Mai stata cosi’ buona!
Original comment: View on YouTube
Grazie mille della ricetta…spiegata benissimo, passo passo.Appena sfornata, un profumo incredibile, venuta benissimo, ❤
Original comment: View on YouTube
Mamma Mia! Love it. Subscribed
Original comment: View on YouTube
Lui è un doppistore
Original comment: View on YouTube
Ma si potrebbe aggiungere un pò di farina di semola rimacinata?
Original comment: View on YouTube
Un ingrediente che puó sostituire il latte? Per me che sono intollerante al lattosio. Grazie! E ottima ricetta complimenti! 👋🏼
Original comment: View on YouTube
Ciao Piatto! complimenti per il video, estremamente chiaro nelle spiegazioni e di qualità. avrei diverse domande da fare1. Come mai opti per una base di partenza acqua/latte quest’ultimo che vantaggi dona all’impasto rispetto ad un alta idratazione solo acqua? La temperatura di acqua e latte sono importanti? mi hanno sempre detto che nella preparazione di lievitati è importante lavorare con liquidi a temperatura tiepida onde evitare che l’impasto si raffreddi sotto le mani tuttavia qui non vi è lavorazione pertanto la temperatura del liquido è fondamentale? 2. sale e lievito , secondo tuo parere entrambi gli ingredienti disciolti nel liquido e poi incorporati nell’impasto per una migliore redistribuzione oppure come mostri nel video con liquidi e sale e lievito a parte? Lo zucchero può essere usato in quantità minima (non sò 10/15 gr e dona davvero colore? o aiuta i lieviti?) 3. in mancanza di piano di acciaio o di pietra (marmo, quarzo e cosi via) posso lavorare secondo te su un tavolo di legno usando qualche accorgimento? (ovviamente non posso ungere il piano)Scusa per le molteplici domande, ma il video è davvero ben realizzato e stimolante e sono sicuro che il prodotto sia spettacolare! Grazie
Original comment: View on YouTube
Il lievito in polvere va bene lo stesso e con la stessa quantità?
Original comment: View on YouTube
La Manitoba va bene?
Original comment: View on YouTube
Si può mettere senza latte e acon qualsiasi farina anche la 00 se è super idratata viene con dei bei alveoli con un ora due ore adesso d inverno
Original comment: View on YouTube
A me piace assai, ma solo un “minuscolo” dettaglio non riesco a mettere in chiaro: quanto impasto in grammi ha inserito nella teglia che pare una 40×30? Le chiedo questo perché una quantità differente a parità di ricetta da origine ad un prodotto completamente differente. Grazie 🙏
Original comment: View on YouTube
🤔🤔🤔😁😁😁😁😁❤️🤗👍💯😋😋😋😋😋😋😋😋😋😋😋😋😋😋Quanto lavorazione…. Bravissimo….🎵🎼🎶🎵🎼🎶🎵🎼🎶🎵🎼🎶
Original comment: View on YouTube
Ciao!risultato fantastico, vorrei provare a farla per pranzo, è giusto se la sera prima faccio il procedimento delle 3 pieghe, lascio in frigo tutta la notte e poi riprendo al mattino dalla seconda lievitazione?grazie
Original comment: View on YouTube
Teig ist es doch… Dauert ja sehr lange der Prozess 😏
Original comment: View on YouTube
Ciao, grazie per la ricetta.Una farina forte con W di almeno 300, a quanta percentuale di proteine corrisponde per favore? A volte quando compro nei supermercati, o anche all’estero, la forza non é specificata, ma le proteine si. Pensi che posso capire quanto forte sia una farina dalla percentuale delle proteine che contiene?Grazie
Original comment: View on YouTube
💯💯💯💯💯💯💯💯💯💯👍
Original comment: View on YouTube
Scusami tanto davvero … ultima domanda, poi non ti stesso piu’ : secondo te, se provo a farla con la nuvola super di caputo, viene piu’ o meno “morbida” che con la manitoba oro ?? Grazie in anticipo !!
Original comment: View on YouTube
Intanto COMPLIMENTISSIMI mamma mia che bravi e che BUONA. Volevo chiedere una cosa: cosa dovrei cambiare al procedimento descritto, se dovessi utilizzare la grilletta 10 velocità Alta Idratazione ?? Basterebbe secondo Lei, solo una prima bella impastata con la grilletta, un solo giro di pieghe e poi in massa e poi appretto in teglia ? Grazie in anticipo e grandi !
Original comment: View on YouTube
Grazie Nella vostra super ricetta sono diventata più brava della mia mamma la focaccia è squisita grazie ancora
Original comment: View on YouTube
Du grand art !!! Magnifique
Original comment: View on YouTube
Meravigliosa
Original comment: View on YouTube
Fantastica,domani ci provo,non sarò così brava come te,complimenti x le meravigliose ricette che dai
Original comment: View on YouTube
太喜欢您的节目了!而且有中文字幕让我对您的节目理解的更有效方便!谢谢您
Original comment: View on YouTube
Salve. Mi sono iscritta dopo aver sentito e visto il video.Meraviglioso il tutto.. Adoro la pizza e tutti i lievitati.. Bravo a te e a tutto lo staff…
Original comment: View on YouTube
Magnifique
Original comment: View on YouTube
Wow la devo provare subito però un consiglio la posso fare la sera per il giorno dopo? Oppure di mattina presto per la sera?👏👏👏👏👏👏👏👏👏👏👏👏👏👏👏😍😍😍😍😍😍
Original comment: View on YouTube
Complimenti…ne ho viste tante, ma bella come questa mai.
Original comment: View on YouTube
Molto bravo complimenti!🎉
Original comment: View on YouTube
Ottimo lavoro 👍 È possibile sostituire il latte con acqua ? Preferisco il “gusto del pane al naturale” di quello con latte e non eccessivamente grassa. Oltretutto di olio ce ne sarà un buon 30 gr o + in totale calcolando tutto quello usato.
Original comment: View on YouTube
Ciao, scusa la considerazione…ma con le dosi della tua ricetta verrebbe fuori più di 1 kg di impasto che mi sembra esagerato per una teglia 30×40. Potresti dire nello specifico che grammatura avrà il panetto per una 30×40?
Original comment: View on YouTube
Yes, for amateurs 85% liquid is already punishment. 😅 My dough takes rest in refrigerator for minimum 12 hours. But i can’t keep so air inside. 🫤 But everytime i make Foccacia, it becomes better and better. Never give up, the result is worth it. 🤤
Original comment: View on YouTube
Come si ottiene una crosta più morbida?
Original comment: View on YouTube
Grazie di questa splendida ricetta, l’ho scaricata subito e conto di farla. Sarrebbe però importante sapere le dimensioni della teglia, non la trovo nè nel vidoe nè nell’infobox. Potreste dire le dimensioni? Grazie
Original comment: View on YouTube
Ciao , que tipo di FARINA e stato utilisato ?! GRAZIE PER LA RISPOSTA ? 🇫🇷🇮🇪🇫🇷🇮🇪👍👍👍⛱⛱⛱☀️☀️☀️
Original comment: View on YouTube
Salve. Bellissima focaccia. Volendola impastare in planetaria quali accorgimenti prendere?
Original comment: View on YouTube
Complimenti siete bravissimi..soprattutto per quanto riguarda riprese e spiegazioni..ottimo lavoro continuate così!!!👏👍🏻
Original comment: View on YouTube
Buongiorno e complimenti 👏 vorrei sapere la grandezza della teglia grazie mille in anticipo 😘
Original comment: View on YouTube
Fantastica.. Cmq farina Caputo è il top
Original comment: View on YouTube
Focaccia fatta con il tuo dosaggio ed é venuta buonissima 😋 il mio impasto però era più molle
Original comment: View on YouTube
Scusa le dosi che indichi sono per due teglie 30 x 40?
Original comment: View on YouTube
Complimenti…splendida ricetta
Original comment: View on YouTube
Spettacolare! Io ho un problema : non ho la 40×30 ma due più piccole. Per calcolare la quantità utilizzo il calcolo dell’area teglia x 0.6? Considera che io la amo spessa. Ti ringrazio anticipatamente 😊
Original comment: View on YouTube
Se sostituisco il lievito secco con quello fresco devo raddoppiare la quantità?
Original comment: View on YouTube
Fatta! Meravigliosa e buonissima!!
Original comment: View on YouTube
Oggi stesso proverò la mia prima focaccia (senza glutine) con la tua ricetta! Grazie di cuore!
Original comment: View on YouTube
ho eseguito seguendo pedissequamente il video e usando la farina tipo 1 del mulino quaglia (Petra 1) e il risultato è stato spettacolare riguardo al gusto ma molto meno riguardo l’ alveolatura che è ben lontana da quella che si vede nel video. Dove potrebbe essere l’errore? Ps. non trovando l’informazione relativa, ho infornato nel secondo livello, è corretto? Grazie per l’eventuale risposta e complimenti
Original comment: View on YouTube
L’ho fatta oggi, davvero fantastica, grazie per la ricetta!
Original comment: View on YouTube
per caso usi una teglia in ferro?
Original comment: View on YouTube
Semplicemente FANTASTICA !!!
Original comment: View on YouTube
C’è l hai una ricetta x farla in meno tempo?
Original comment: View on YouTube
Vorrei usare il lievito fresco come percentuale 15 g vanno bene al posto di 3 del secco? Grazie in anticipo per la risposta 😍🤗
Original comment: View on YouTube
Se voglio sostituire il ldb secco a quello fresco. Quanto?
Original comment: View on YouTube
Ciao la Manitoba va bene x questa focaccia
Original comment: View on YouTube
Bella mi piaccionno i recordi di taranto
Original comment: View on YouTube
Buono sicuramente e brava l’esecutrice, ma, dovrei consumare un giorno intero di ferie per realizzarlo, piegando e ripegando e ripiegando. Ne vale la pena per un pane, seppur buono ?. Ci proverò. By by.
Original comment: View on YouTube
Complimenti per la spiegazione ! Unico appunto, te sei magnato piu’ glutine che pizza☺️
Original comment: View on YouTube
L’ho fatta oggi , ottimo,alla fine sembra di avere in mano un palloncino pieno di gas elio ,come quei palloncini che vendono su le fiere . Ottimo 👍
Original comment: View on YouTube
Sarà pure senza impasto ma ci vuole una giornata intera di lavoro vicino per poter arrivare ad infornare, insomma… ma qualcosa di più veloce non si può fare..???
Original comment: View on YouTube
Buonasera! bellissima focaccia andrebbe bene per realizzarla la farina Manitoba Spadoni tipo 1, o quale altro tipo!? Grazie e buona serata 🤗
Original comment: View on YouTube
Ciao. Dove io avito le farine non hanno una descripcióne della doppio W. Semplicemente dicono la percentuale di proteina per 100 grammi di farina. Quanta proteína debe avere la farina per la tua focaccia?12, 12.5, 15.?Grazie è scusa il mio italiano. Buona giornata.
Original comment: View on YouTube
Ciao volevo sapere le dimensioni della tegliaGrazie
Original comment: View on YouTube
Ultima domanda:Se usassi il lievito madre i tempi si allungano di quanto?Devo togliere farina e/o acqua usando il lievito madre?
Original comment: View on YouTube
STUPENDA!!!!! GRAZIE DEL VOSTRO IMPEGNO E BRAVURA👍Sono vegana. Va bene anche il latte di soia oppure meglio mischiarlo con panna di soia per avere più grassi?
Original comment: View on YouTube
Grazie mille, in caso di temperatura di lievitazione più alta, diciamo 27 gradi (estate oppure cella di lievitazione), ha senso pensare di dimezzare i tempi?
Original comment: View on YouTube
Scusa visto che ci sono, vorrei sapere quanto lievito di birra fresco ci vuole per questa ricetta? Non uso il lievito disidratato. Grazie 💋
Original comment: View on YouTube
Complimenti 👏 ti ho trovato per caso, mi è piaciuto molto il tuo modo di spiegare e anche di fare, di nuovo complimenti 👏👏👏 mi sono subito iscritta.
Original comment: View on YouTube
Da manuale 😋😋😋
Original comment: View on YouTube
Video spettacolare, voglio prorpio provare a farla. Un unica domanda, magari ho perso io l’ info io nel video, ma le misura della teglia per questa quantità d’ impasto? Grazie mille
Original comment: View on YouTube
6 ore di lievitazione ma calcoli anche il tempo della lavorazione?
Original comment: View on YouTube
Ottima focaccia idem pizza cmq bisogna stare con mani in pasta per molto lascia e piglia e ti passa la giornata troppo tempo per me Una cosa veloce fare mattina infornare x cena?non esiste bravi cmq
Original comment: View on YouTube
Dato che non siamo tutti fornai dateci indicazioni più precise come che farina usare
Original comment: View on YouTube
Ciao bella ricetta ma mi sembra tanto impasto per una teglia 30×40
Original comment: View on YouTube
Provata…. PERFETTAGRAZIE
Original comment: View on YouTube
Fatta! Un successone…grazie!!!
Original comment: View on YouTube
Grazie, complimenti è davvero “focacciosa”😋😋😋👏👏👏👍👍👍💯💯💯❤❤❤💋💋💋
Original comment: View on YouTube
Tutto bello, tutto bene, ma non si può passare un giorno per fare una focaccia! Pregasi illustrare focacce fattibili più rapidamente!
Original comment: View on YouTube
Mamma mia ke goduria
Original comment: View on YouTube
Bellissima! Ce l’ho in lievitazione, ma ho una domanda: per teglia uso quella del forno, devo ungerla? Grazie 😊
Original comment: View on YouTube
Salve che farina posso usare io in casa ho la fatina quella delle farine magiche che ha 360W quella che uso per i panettoni e dolci a lunga lievitazione va bene se uso quella grazie
Original comment: View on YouTube
Grazie per la ricetta 😀
Original comment: View on YouTube
Bene adesso mi metto all’opera per la realizzazione di questa fantastica focaccia, ma perché non fate anche il video che ci mostra come fare la pizza al 70% idratazione con la farina Caputo nuvola? Grazie
Original comment: View on YouTube
Bellissima io ho il lievito madre posso usare quello?
Original comment: View on YouTube
Ciao! È da un pò che mi cimento ormai e con ottimi risultati.. volevo sapere, perche il latte? Grazie!
Original comment: View on YouTube
Seguito tutto alla lettera,impasto mollissimo,ho dovuto aggiungere farina,e mo non lievita ,cosa ho sbagliato? La farina ho usato la 00
Original comment: View on YouTube
Bellissima ma come si fa a dire senza impasto!😜
Original comment: View on YouTube
Posso usare la farina di semola rimacinata di grano duro e il lievito di birra fresco ? Grazie.
Original comment: View on YouTube
Troppo lavoro, meglio una impastata, pieghe e via, nenanche un bebè ha bisogno di essere seguito così , dove è il vantaggio rispetto ad impastare?
Original comment: View on YouTube
Proverò presto a farla… thanks
Original comment: View on YouTube
👍😋👏👏👏
Original comment: View on YouTube
Si può fare solo con acqua, senza latte
Original comment: View on YouTube
👏👏👏👏👏💎❤️💋🍭🐾
Original comment: View on YouTube
Salve se uso LDB fresco quanto ne devo mettere? grazie
Original comment: View on YouTube
Ma la teglia quanto è grande per queste quantità?
Original comment: View on YouTube
Farina manitoba?
Original comment: View on YouTube
Grazie mille per la ricetta sono Paola iscritta da poco ma ho replicato già due volte questa meravigliosa focaccia 😊🤗
Original comment: View on YouTube
Bravissimo ottimo e buonissimo. Lo rifarò. Sicuramente.. Procedimento. Ottimo. 👍💪👏👏👏😘🤩
Original comment: View on YouTube
Non ho trovato il tipo di farina da usare!!
Original comment: View on YouTube
Ottima
Original comment: View on YouTube
Complimenti… è splendivigliosa 🤩😍👍
Original comment: View on YouTube
Con lievito madre quanto ne metto grazie
Original comment: View on YouTube
Bellissima, ma la lievitazione si fà fuori dal frigo?
Original comment: View on YouTube
Salve mi sono appena iscritta volevo chiederti in caso volessi sostituire il lievito secco con il lievito madre con questo quantitativo quando ne dovrei mettere? Grazie
Original comment: View on YouTube
Per preparare la focaccia a pranzo quando devo incominciare ad impastare ?potrei farla il giorno prima e lasciarla in frigo una notte prima distenderla in teglia?grazie sono una nuova iscritta
Original comment: View on YouTube
Ok , commento chiaro ,e concreto👍
Original comment: View on YouTube
Che spettacolo! Molto ben spiegata veramente da rifare fa venire l’acquolina in bocca con voi si va sul sicuro 👍🏻
Original comment: View on YouTube
Veramente golosa eccezionale 👏👏👏
Original comment: View on YouTube
Che bontà Scrocchiarella come piace a meMi sembra di sentire il profumo
Original comment: View on YouTube